| |
|
WELCOME TO OUR PHOTO TOUR
&
GAME MANAGEMENT ANALYSIS
of
THE FRONT NINE
|
|
 |
|

|
| |
|
FRONT NINE PLAYING GUIDE |
|
|
|
| |
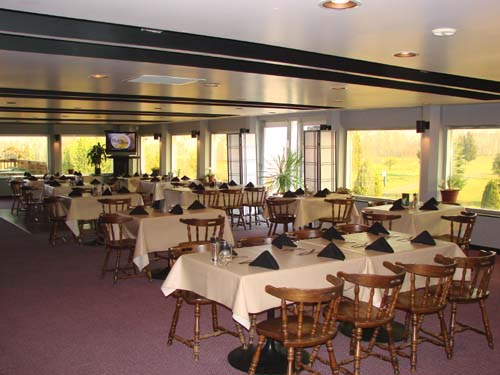
| PUTTING GREEN |
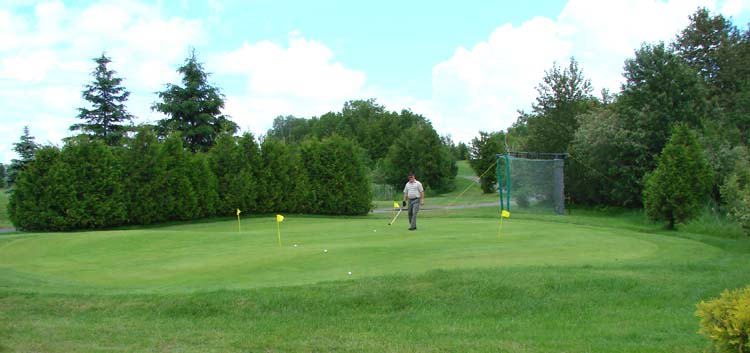 |
| The putting green is located beside the path leading up to
the first hole. In the background you can see the "net" where
players can warm up with their woods and irons. It is recommended that all
players spend some time warming up prior to heading out for their round.
The putting green is kept in excellent condition and will give you a good
indication of the greens on the course. The "cage" is set up so
that you can get some practice swings in with most of your clubs while you
are waiting your turn to go up to the first tee. |
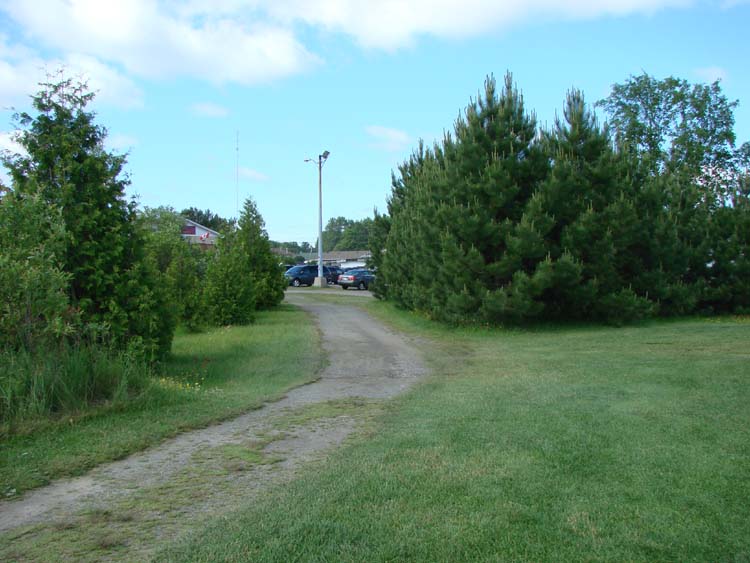
| CART PATH TO HOLE #1 |
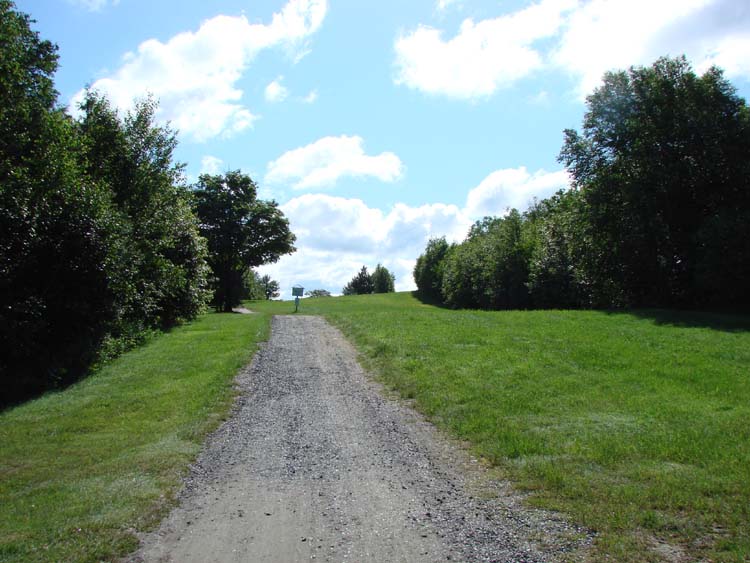 |
 The cart path up to the first tee area provides you with a
beautiful, natural corridor to the course. The cart path up to the first tee area provides you with a
beautiful, natural corridor to the course.
As you get near the middle
point of the climb you are asked to wait under the big tree until the tee
area is cleared of the golfers in front of you.
This is a courtesy we ask
all golfers to honour so as not to distract the party in front.
|
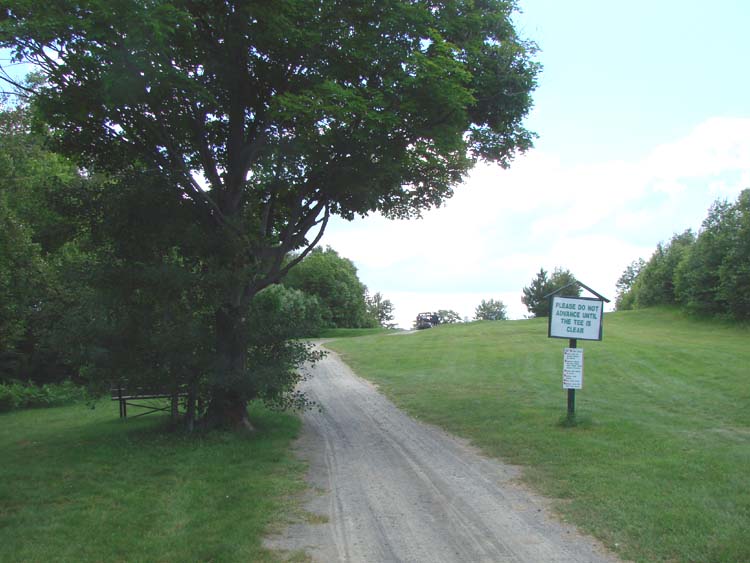
| WAITING AREA FOR 1ST TEE TO CLEAR |
|
|
|
The waiting area gives you a good view of the first tee and allows you to
wait in the shade of the tree on hot summer days. Once the players have
left the tee area you are free to move up to prepare to begin your round
on the first hole.
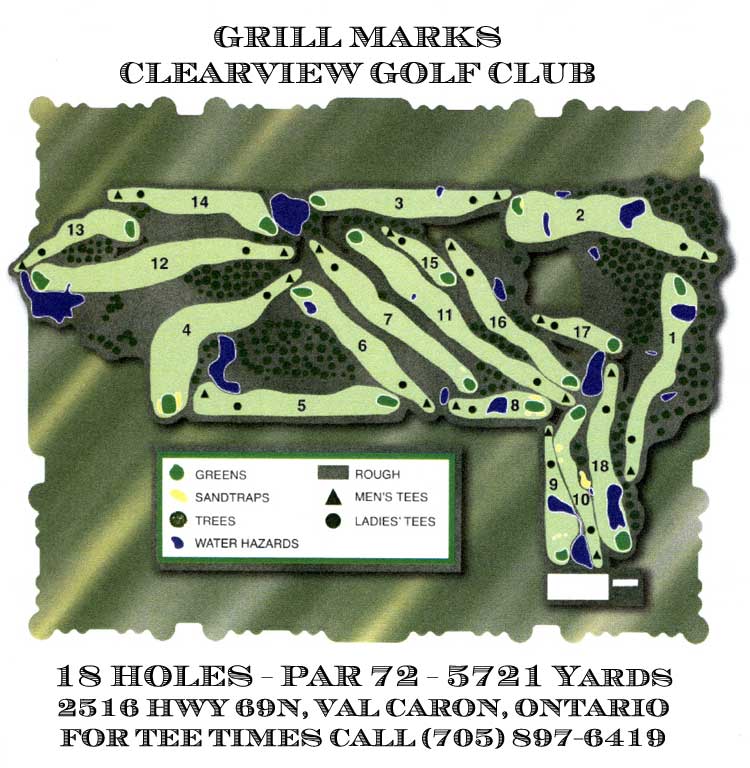
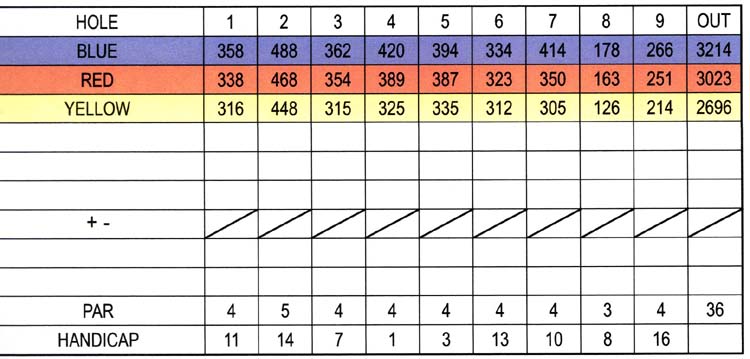
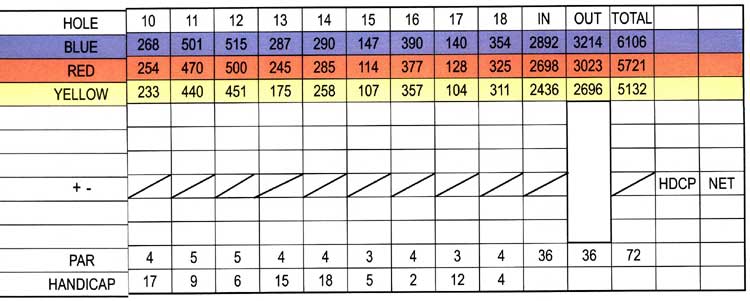
 The front nine is just over 3000 yards long and comes in with a par 36.
There is only one par 5 and one par 3. This track is one where an average
golfer should be able to feel good about the final score if he/she manages the course
well. A score of 40 is not out of the question for the better golfers,
unless you run into penalty trouble. Stay out of trouble, avoid penalty
strokes, and you have a good shot at a four to six over par round. If you
are an average golfer and you come in with a score of anywhere from a 42
to 44, you have done well on the front nine. The front nine is just over 3000 yards long and comes in with a par 36.
There is only one par 5 and one par 3. This track is one where an average
golfer should be able to feel good about the final score if he/she manages the course
well. A score of 40 is not out of the question for the better golfers,
unless you run into penalty trouble. Stay out of trouble, avoid penalty
strokes, and you have a good shot at a four to six over par round. If you
are an average golfer and you come in with a score of anywhere from a 42
to 44, you have done well on the front nine.
WINTER RULES APPLY to all
areas of the course. This means that you can move your ball, with your
club face, up to a full club length away from the original landing place,
no closer to the hole, without penalty. We recommend that you even allow
the winter rules to apply in what might be considered rough and/or bush
areas in order to avoid damaging your club on rocks that may be hidden
beneath the ground surface. |
|

|
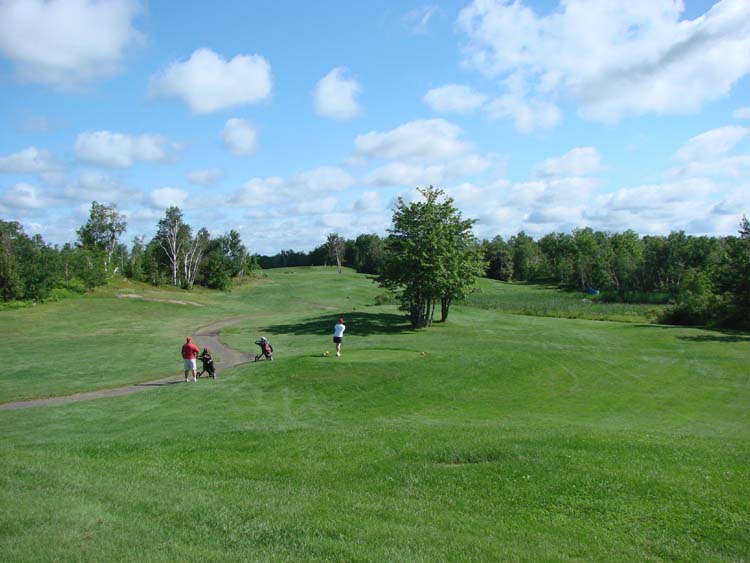
| FROM THE TEE |
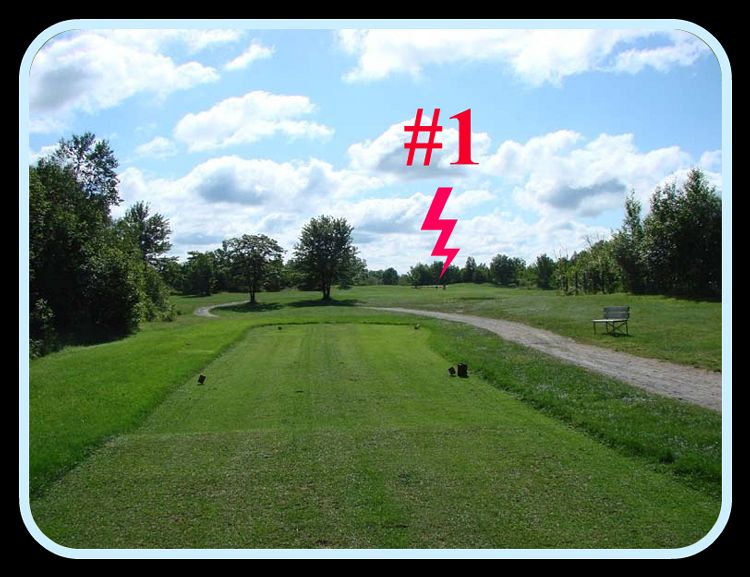 |
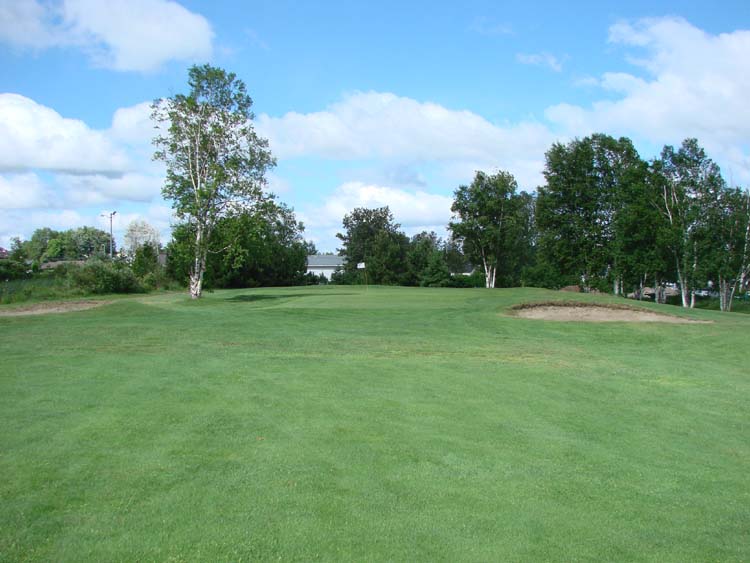
| The first hole allows you to get right into the game with
your favourite woods, but it is also deceptively dangerous if you try to
overpower your shot. This is a relatively easy 338 yard par four,
therefore if you are a long-ball hitter, you will have a very short second
shot to the green.
You should
be trying to aim your shot to the right of the two trees, about to the
middle (note the lightning mark in the above photo). You can just make out the green in the distance (middle of the
photo), but it is wise to aim just to  the right of the green so that you
land in the opening with anywhere from a 100 to a 150 yard second shot. the right of the green so that you
land in the opening with anywhere from a 100 to a 150 yard second shot.
If
you try to overpower your driver, you have a chance of pulling to the left
and you will enter the trees along the left hand side of the fairway. That
will leave you with a blind shot from the rough to the green.
If you slice to
the right, you will end up in the bush and be in deep trouble.
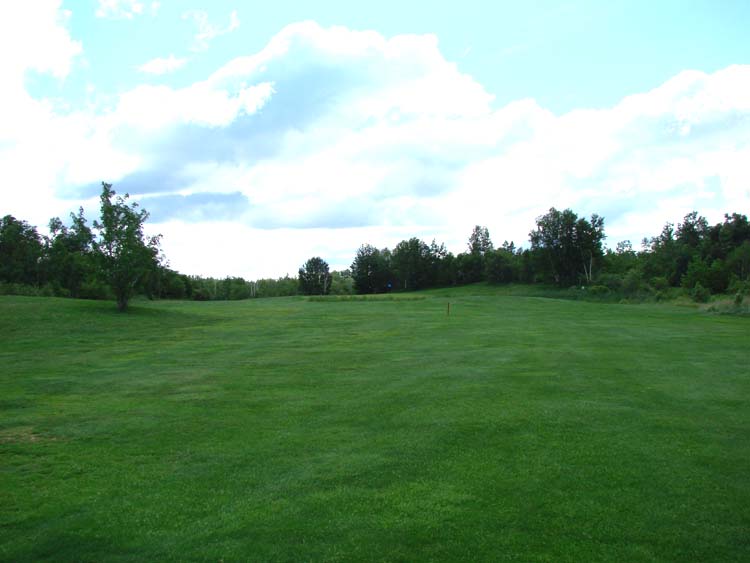
The best
shot is one that travels about 200 yards off the tee and lands in the open
fairway. If you look at the photo below, you will see the view to the
green from the 150 yard marker. If your ball lands anywhere between the 150
and 100 yard markers you will be in perfect position for your second shot.
Many people use their three wood or their three iron in order to make sure
that they land in a safe position for the second shot. People who try to
hit the ball 250 yards or more stand a good chance of rolling into trouble on
the left or right of the fairway.
|
 |
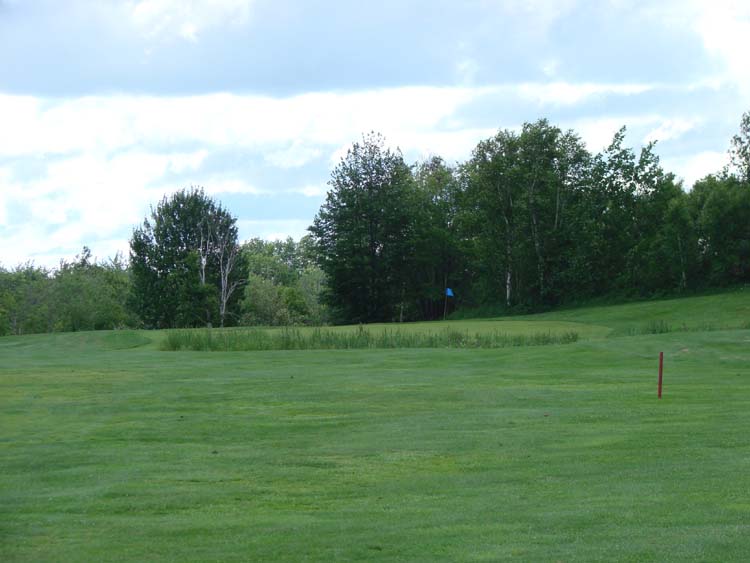
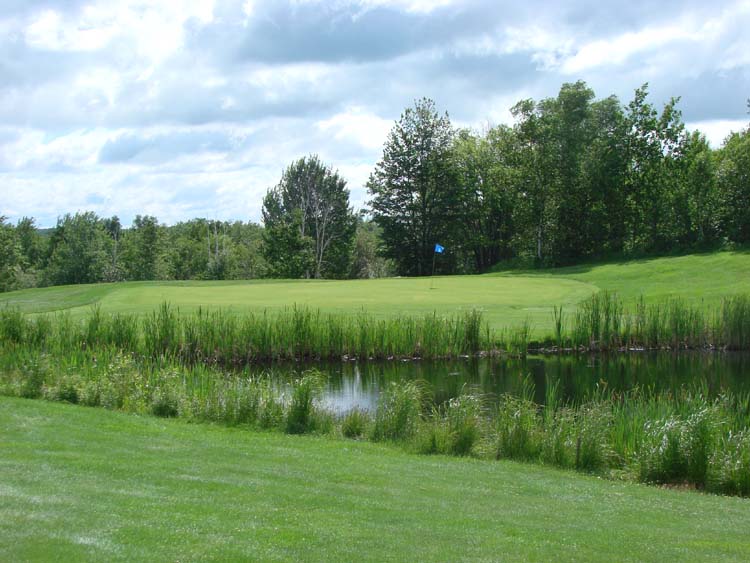
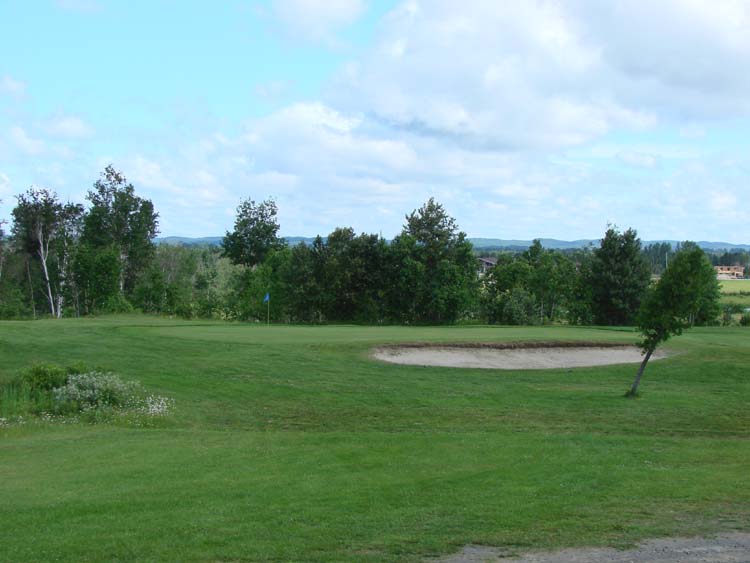
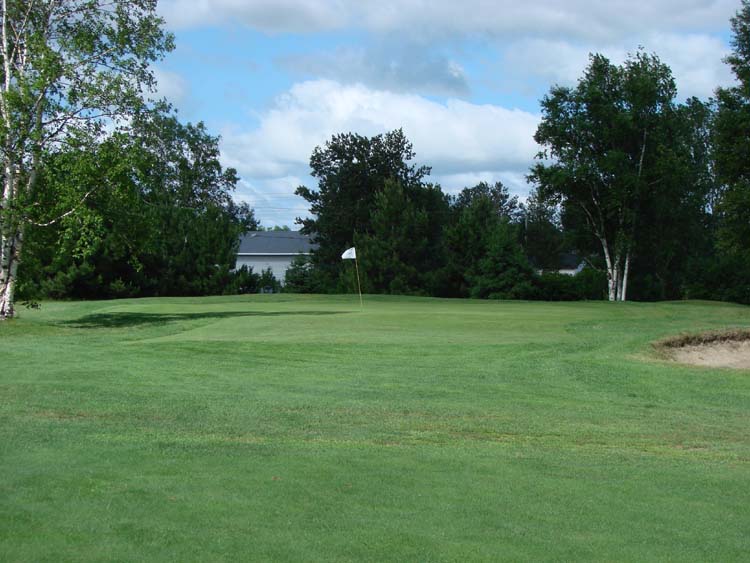
As you will see from the following photos, this is a
relatively easy green to hit. The challenge is to make sure you hit the
ball long enough to clear the water in front. 
The landing area between the
water and the green is not very large. Therefore, you must make sure that
you hit your ball so that it goes long and to the left of the water if
anything.
You want to avoid going long and to the right. If you go right,
you will be in some deep rough and your chip will be moving downhill on
the green. If you go long, you may roll down the embankment behind the
hole and be chipping back blind.
The safe shot is to the left so that if
you are short, you won't put the water into play. However, if your first
shot is on the fairway leaving you from 100 to 150 yards to the hole, you
should have no trouble hitting the green in regulation.
|
| A BETTER VIEW OF THE TARGET GREEN |
 |
| FIRST GREEN - SPECTACULAR VIEW |
 |
| Looking back from the green gives you a chance to see the
deceptive beauty of this hole. It is one that should be easy to par, but
it can also give you a bad start to the round and leave you scrambling
right from the beginning. It is best to play this one safe and not get too
aggressive. It is an easy hole to par, but a real challenge to get a
birdie. |
 |
| |
|

|
| VIEW OF WHITSON LAKE (Behind the tee) |
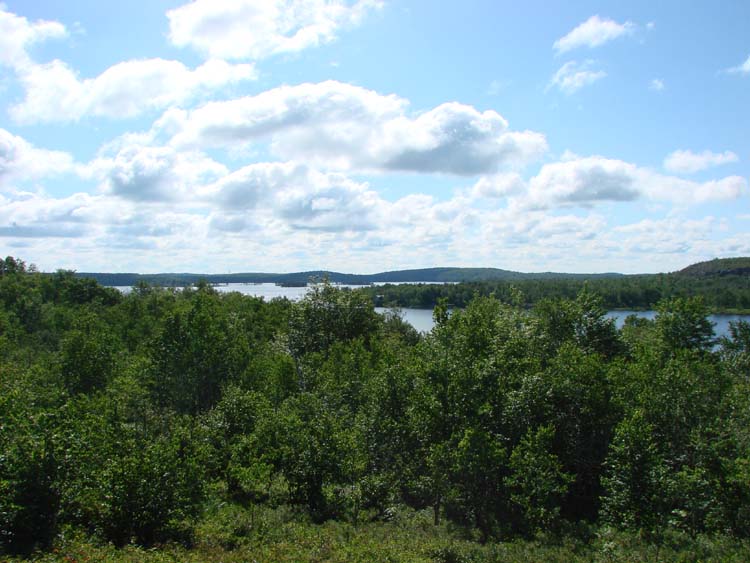 |
| If you have time, you should climb the small hill behind
the blue tees and take in the spectacular view of the Whitson Lake. |
|
|
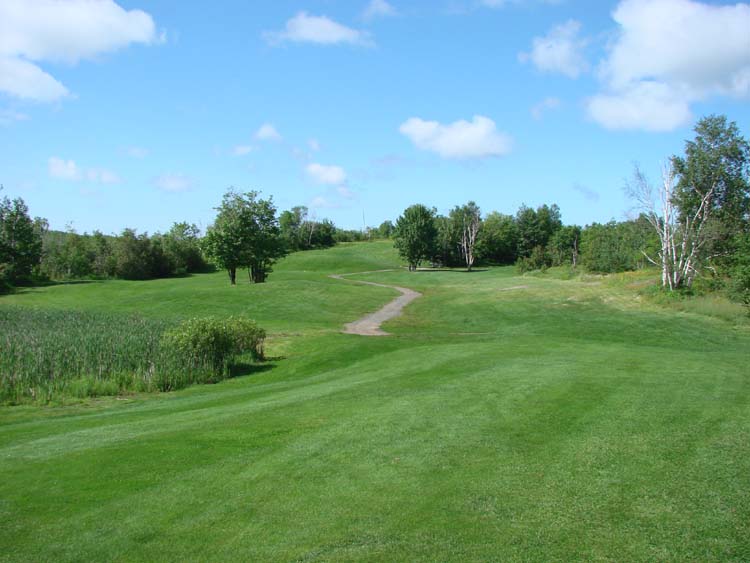
| Many golfers consider this to be the hardest hole of the
course.
 To get an idea of what you are up against, look at the photo above
and below. To get an idea of what you are up against, look at the photo above
and below.
Your tee shot from the Reds is coming near the top of the hill
and must carry over 200 yards to be safe from landing in the water hazard
on the right.
Most golfers must use their three wood or driver on this
hole, but there is trouble to the left, right and centre. If you hook or
slice at all, you may find yourself in the woods. The best play is to aim
just to the left of the tree in the middle of the fairway in order to
allow yourself leeway either way. The big thing is to hit the ball long
enough to clear the water.
|
|
|
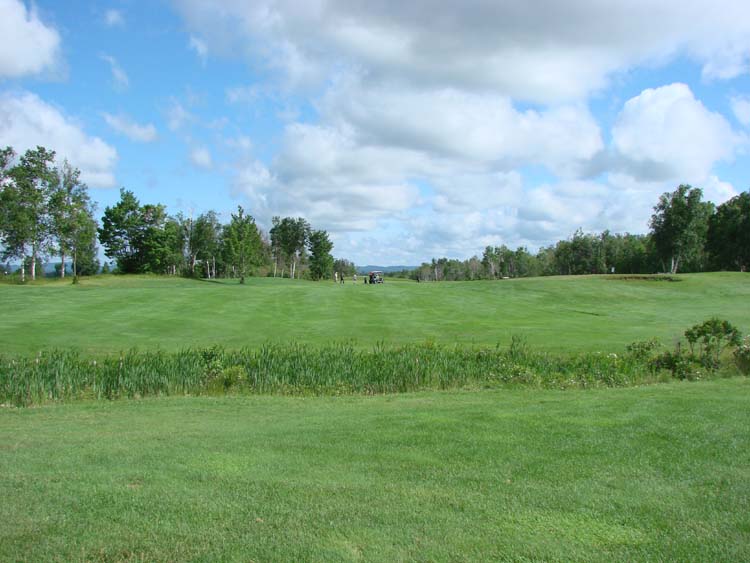
| A 200 plus yard shot will then put you near the top of the
ridge, or even allow you to roll over it and down into the gully below.
There is no trouble if you hit this one long, as long as you stay in the
middle. As you can see from looking back, there is not much room for error
on this hole. |
|
|
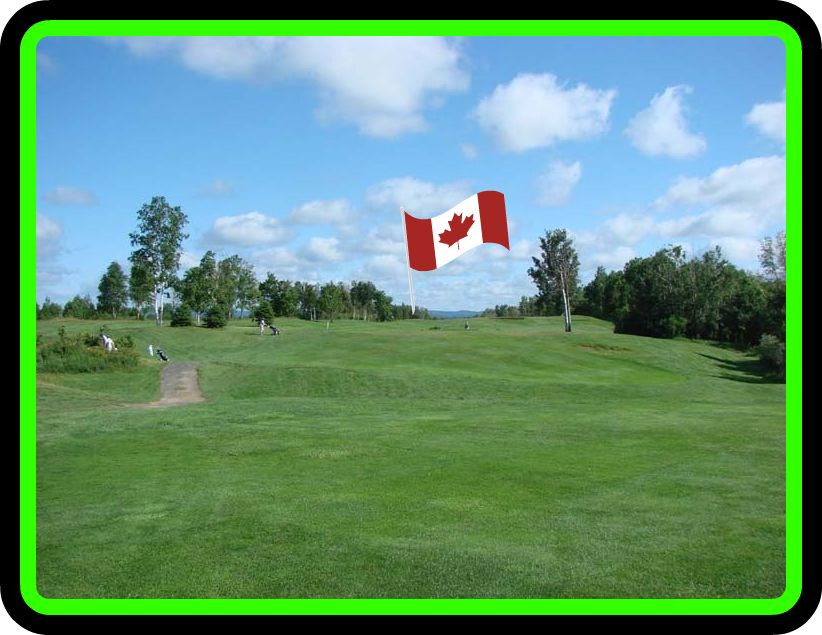
| If you get to the top of the ridge, you have a pretty clear
view to the green, which is in the middle of the photo above. Just look at
where the flag pole is for the Canadian Flag insert. The photo
below gives you a point of reference to aim for. As you can see, there is
plenty of space to land your second shot. |
 |
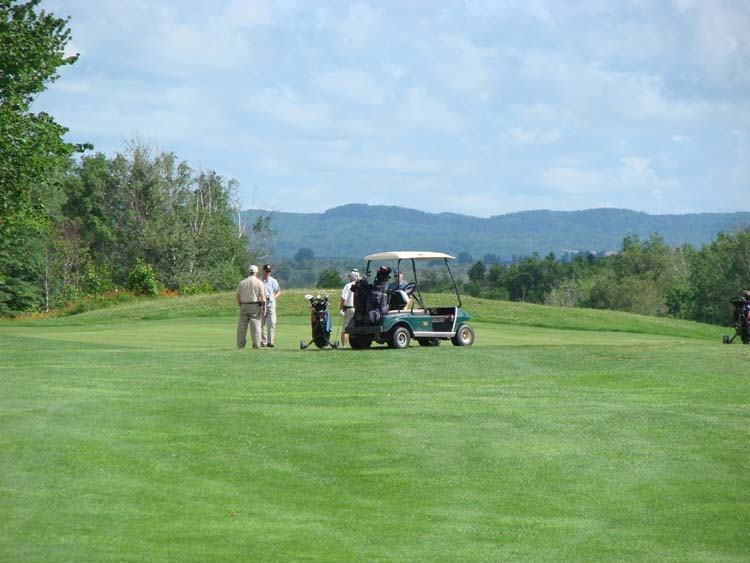
| It is difficult to get into any kind of trouble with your
second shot, so as long as you hit it as hard as you can and can get it to
travel the full distance, you should be in good shape to get on the green
in regulation. |
 |
| As you approach the green, you are cautioned to avoid going
long or to the right or left. If you are going to make a mistake, make it
short. This should be an easy hole to par as long as you don't get into
trouble on your tee shot. If you get over the gully with your second shot,
you can easily make the green in three. However, if you can get some good
distance on your second shot, this is a hole where you may be able to pull
out a birdie. |
|
|
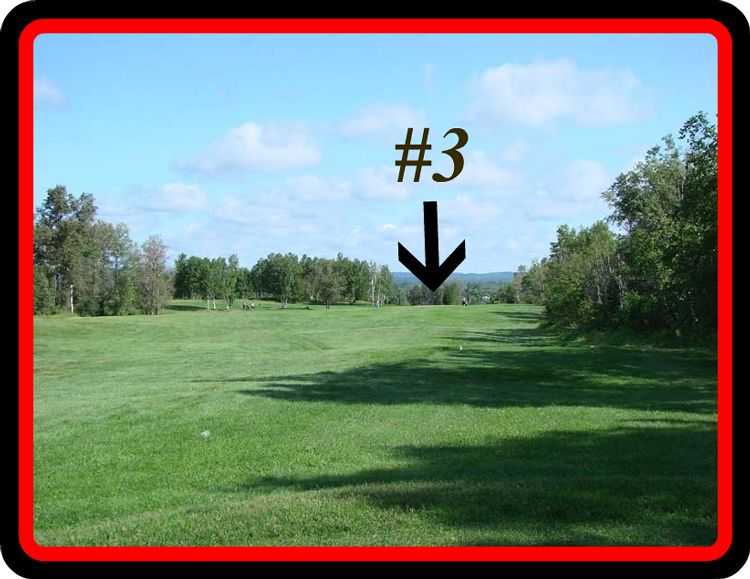 |
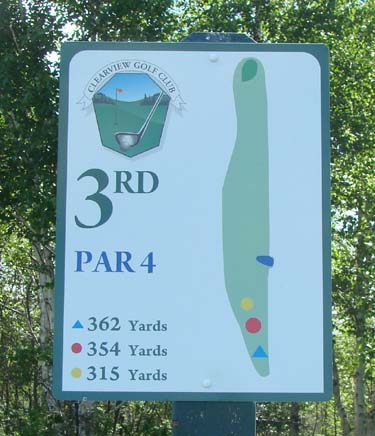
 The third hole is a real challenge for right-handers who
slice or left-handers who hook. The third hole is a real challenge for right-handers who
slice or left-handers who hook.
The natural inclination is to aim straight
for the green, which is to the right-center of the photo above. To go as
the "crow flies" means following a "tight-rope" that
runs right along the tree line.
Don't be fooled. This hole is 354 yards
long so you can "swing away" with your driver. However, it is
recommended that you aim to the left of the green and not right at it.
Doing this gives you plenty of room to land if your ball doesn't do what
it is supposed to do. You can't really get into trouble if you hit away
and to the left of the green. A wild shot may end up coming dangerously
close to the bush area on the left, but if you go over there you deserve
to be in trouble. Most golfers who play it safe and hit away just towards
the left of the arrow in the photo above end up in pretty good shape to
approach the green.
This is a very tough hole to birdie, so go for your par and be happy.
|
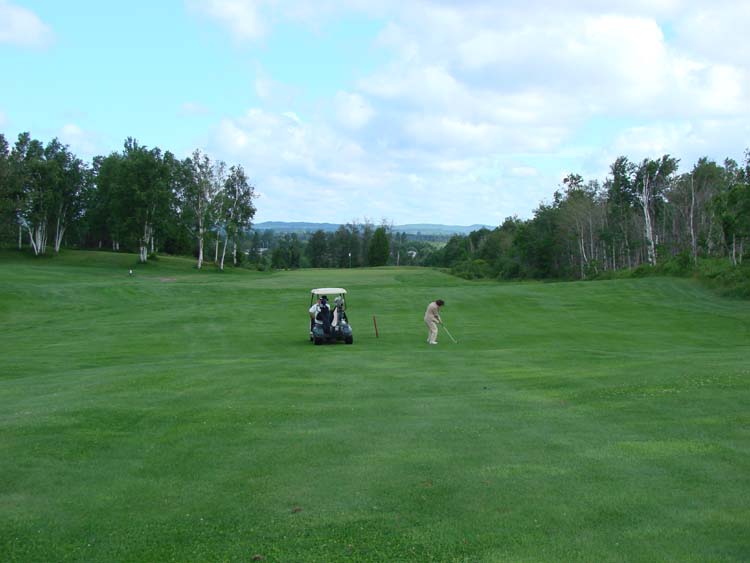 |
| The approach to the green is pretty good.
 However, once
again this is where you can be deceived. The green looks so close that
most golfers will be inclined to "go for the hole".
However, once
again this is where you can be deceived. The green looks so close that
most golfers will be inclined to "go for the hole".
Don't miss
to the right or you will be in deep rough chipping up on a green that
slopes to the left. There is a huge ditch in front of the hole as well, so
you don't want to be too short.
The best strategy is to aim for the left
front of the green and try to bounce and roll on to the putting surface.
If you roll to the left, you will be putting or chipping up-hill and will
have a better chance of getting up and down for a par. If you hit the ball too long,
you once again will find yourself chipping out of long rough to a green
that slopes in the opposite direction. This hole will yield more
bogies than birdies. It is a very difficult hole to birdie, so if you get
a par take it with pride and move on.
|
 |
| |
|
|
|
|
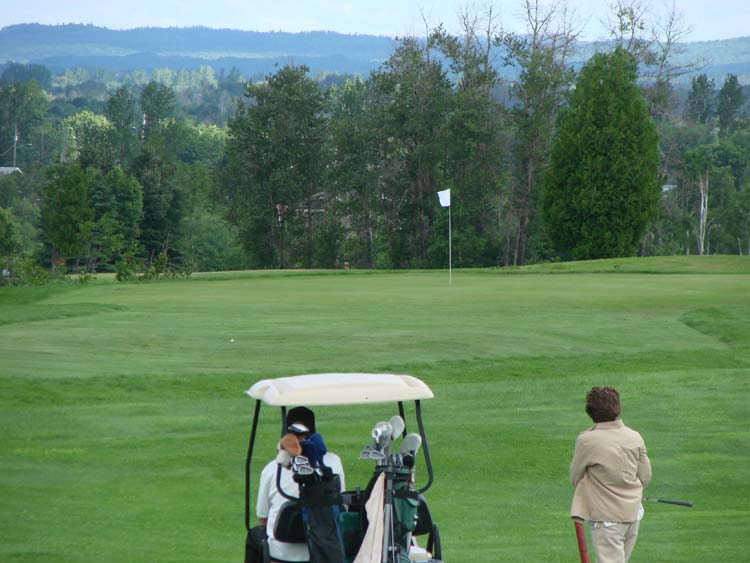
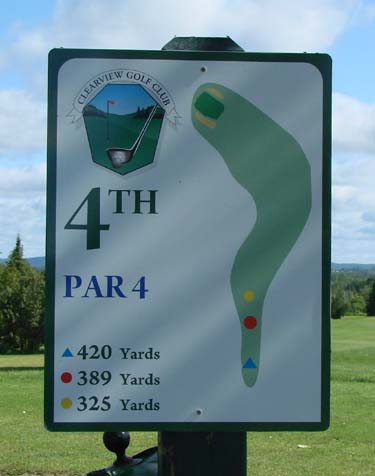
 The fourth hole is one
of the toughest holes on the course. At best you may hope for a par. The drainage ditch,
which is considered a hazard, that you see running across the fairway is in
play for most long hitters. You don't want to be hitting out of that ditch
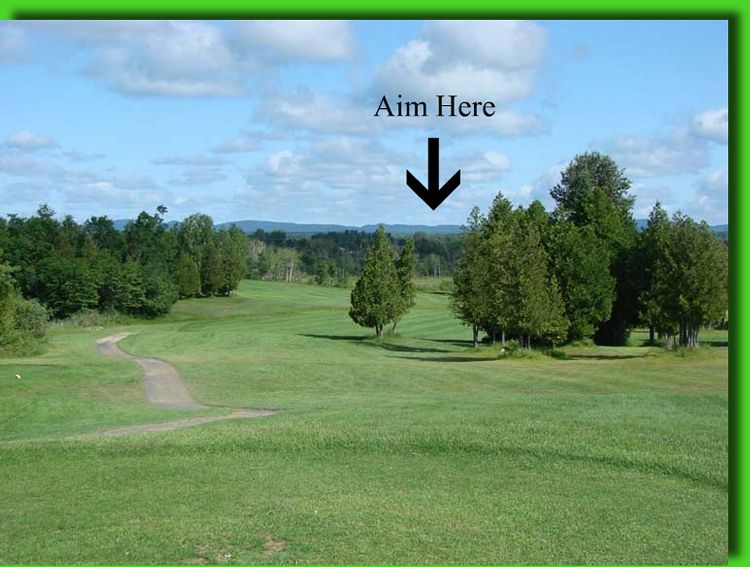
on your second. If you aim for the two trees in the middle of the photo,
there is a lot of room to land behind the tree. The perfect shot is to
have your ball go between the middle trees and the cluster on the right.
There is even some room behind the large cluster to the right. You DON'T
want to hit your ball to the left since there is water and trouble all
over the place on the left. You will also have trouble getting your ball
up and over the cluster of trees on the left even if you do have a shot.
The best way to manage this hole is to hit your three wood or three iron
about 200 yards out and just beyond the middle trees so that you have the
view below. The fourth hole is one
of the toughest holes on the course. At best you may hope for a par. The drainage ditch,
which is considered a hazard, that you see running across the fairway is in
play for most long hitters. You don't want to be hitting out of that ditch
on your second. If you aim for the two trees in the middle of the photo,
there is a lot of room to land behind the tree. The perfect shot is to
have your ball go between the middle trees and the cluster on the right.
There is even some room behind the large cluster to the right. You DON'T
want to hit your ball to the left since there is water and trouble all
over the place on the left. You will also have trouble getting your ball
up and over the cluster of trees on the left even if you do have a shot.
The best way to manage this hole is to hit your three wood or three iron
about 200 yards out and just beyond the middle trees so that you have the
view below. |
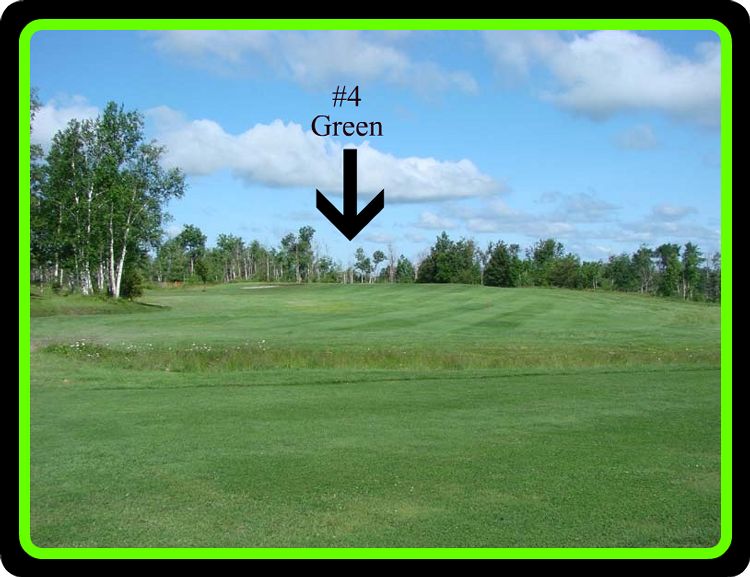 |
| If you land on the safe part of the fairway, you have a
clear shot to the green. However, you will still be around 200 yards away.
If you look at the photo below, you will see that there is nothing but
trouble around this green. You can aim directly for the green, but make
sure you stay on the top of the ridge and land short, if anything.
This is a hole where you should resign yourself to the fact that you will
be chipping your 3rd shot on to the green. Therefore, if you can land
close to the green, without getting yourself into one of the three bunkers
around the green, you still have a shot at a "chip and putt" for
a par. The best strategy is to land just short of the green up on the
ridge so that you are chipping on the same level as the green. |
 |
| This hole invites golfers to take risks. Hit the ball long
and you are in trouble. Hit the ball to the right and you are in trouble.
Hit the ball to the left and you are in a bunker from which it is
difficult to escape. If you can get out of this hole with a five, take a
deep breath and be thankful. If you come up with a par, you are either
good or lucky. Get a birdie and you can celebrate all the way back to the
clubhouse. |
 |
| |
|
|
| |
 |
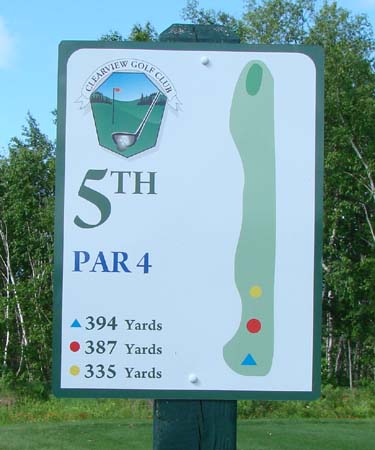
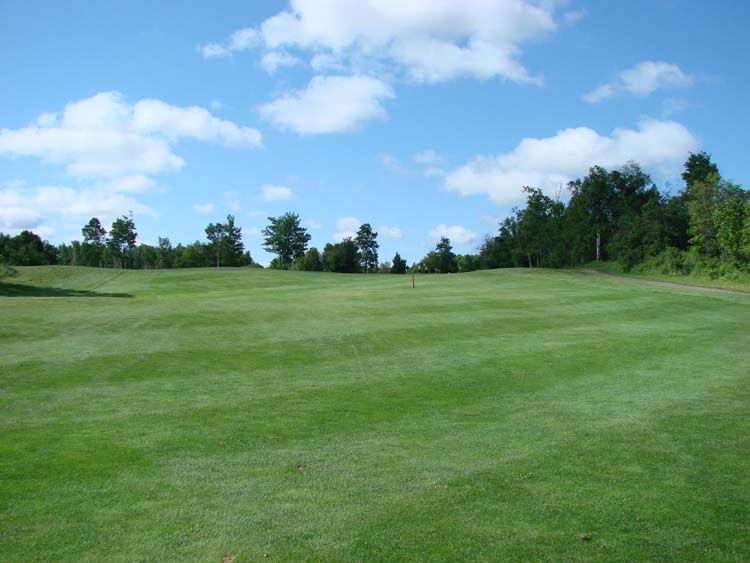
 This hole plays with your mind! When you step on to the tee
you are going to take out your driver. This hole plays with your mind! When you step on to the tee
you are going to take out your driver.
There is so much green space in
front of you that it is impossible to get into trouble...or is it?
Once
again you are aiming for a green that follows a direct path along the tree
line. Aim for the hole if you are confident with your shot. However, go
anywhere towards the right hand side of the fairway and you are going to regret it. The best approach is to hit the ball hard and to the
middle of the photo, just to the left of the arrow. That means that you will be aiming to the left of the
green, but unless you make a huge mistake with your drive, you will still
have a good approach to the green with your second.
|
 |
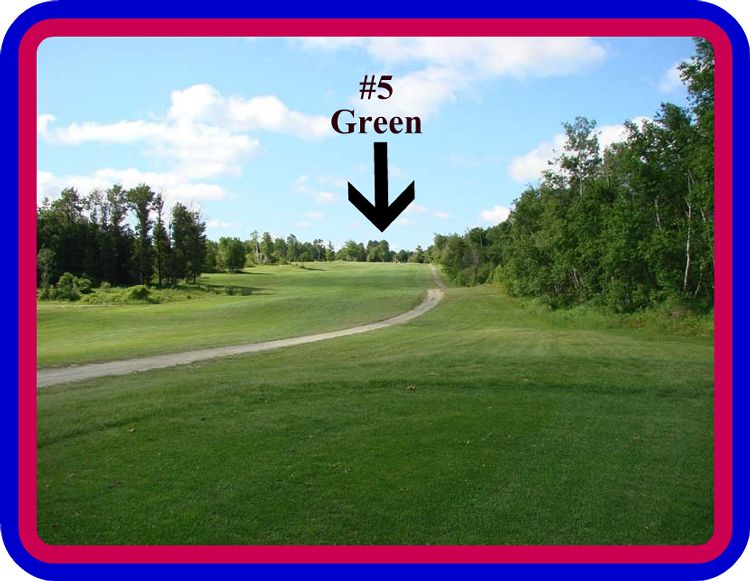
 Your second shot will likely be anywhere from 100 to 150
yards to the hole. Your second shot will likely be anywhere from 100 to 150
yards to the hole.
You are hitting uphill to the hole, so this makes it
hard to judge distance.
However, as you can see from the photo below,
there is little trouble for you as long as you hit the ball directly
towards the green. The bushes in the back of the green are quite a bit
away, so they shouldn't come into play unless you selected the wrong club.
Don't get too close to the bushes on the right because the cart path will
bounce your ball into trouble. Hit to the green or just to the left of the
flag and you should be in good shape. This is an easy green to hit in two
or at least be going for a relatively short "chip and put" for
par.
|
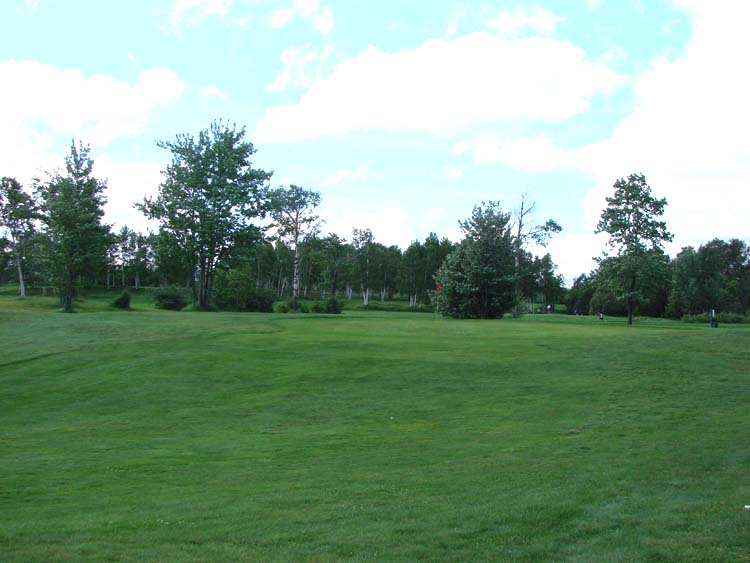 |
| As you can see from the photo below, which shows you the
view looking back from the green, this is one of the
most beautiful holes on the course. Yet, it can yield some pretty high
scores if you are not careful. |
 |
| |
|
|
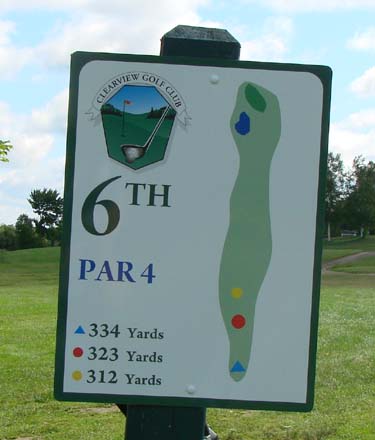
| |
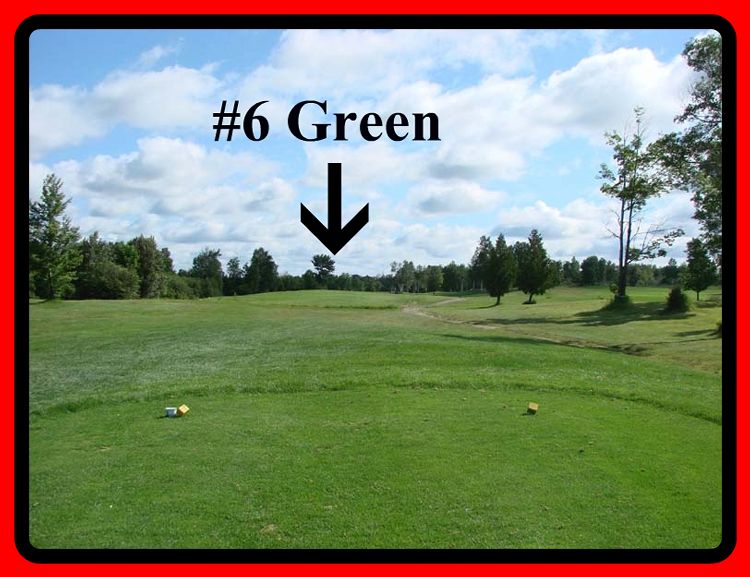 |
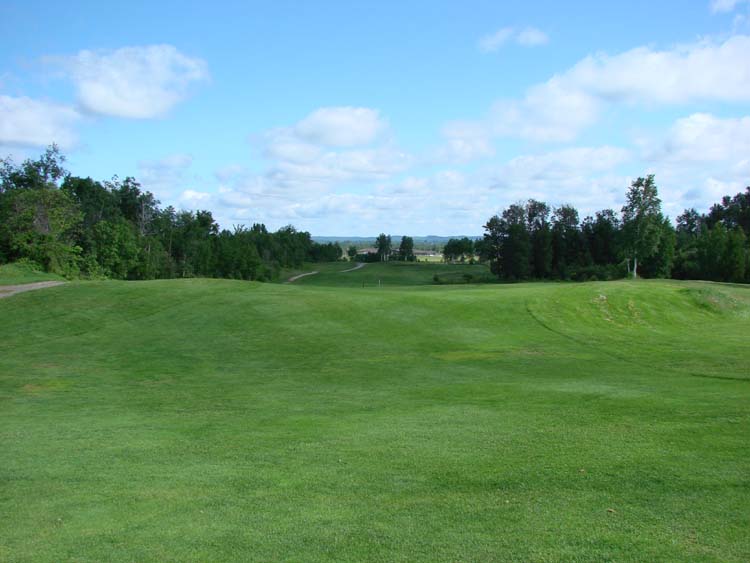
| This is a short par 4 that should present you with no real problems, as long as you stay to the middle or right hand side of the
fairway. Long ball hitters who drift to the left can get themselves into
trouble from rolling into the bush. The fairway slopes to the left. There is a water hazard in
front of the green, but you really must hit your ball a long way for that
to come into play. If you can hit the ball that long, you deserve to be in
trouble. |
 |
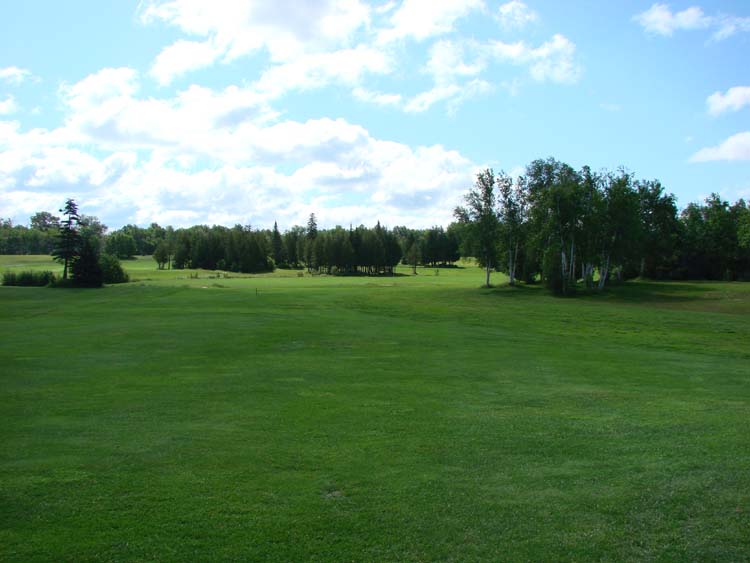
| You can see from the photo above that there is plenty of
landing space on this fairway. Hit your ball out about 200 yards to the
middle or just right of the middle and you have a nice easy approach to
the green with your second shot.
When approaching the green, you are best to hit your ball
to the right hand side of the green. The hazard to the left is
unforgiving. If you are coming in from around 100 to 150 yards, you have a
good chance to be on the green in two. If the pin is placed at the back
left of the green, it will test your courage. You can go long on this
green and still avoid trouble, but stay away from the left.
|
 |
| |
|
|
| |
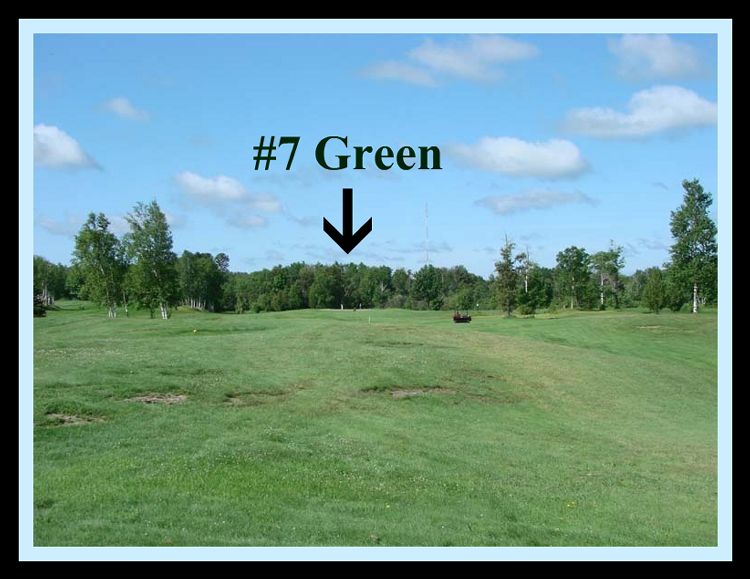 |
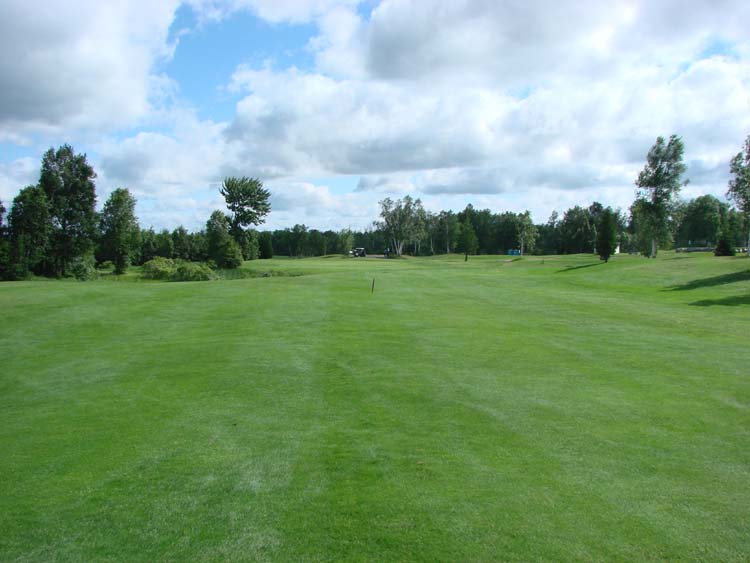
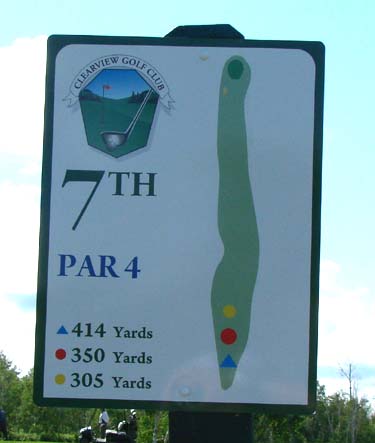
 You can hit away on the seventh. This is the "long
drive hole" of the front nine. You can hit away on the seventh. This is the "long
drive hole" of the front nine.
If you stay pretty well down the
middle or to the right, you can't get into much trouble. If you hit the
ball to the left, you go on the 10th fairway and have a good angle to the
green.
However, going to the left puts the water hazard into play, so you
either must hit it "far left" or "really long". The
rough along the left hand side separating the two fairways is quite long
as well.
|
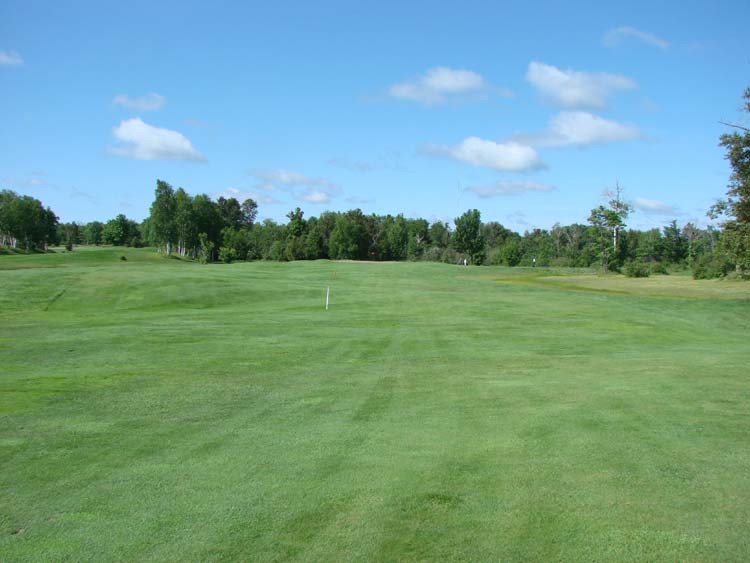 |
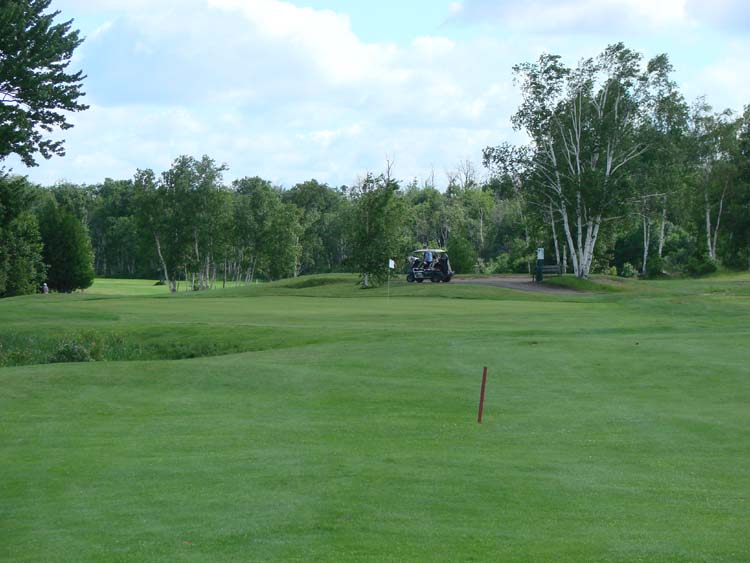
| The photos above and below give you a good idea of what
lies ahead of you for your second shot. The green is right in the middle
and all you have to do is select the right club to get the distance. |
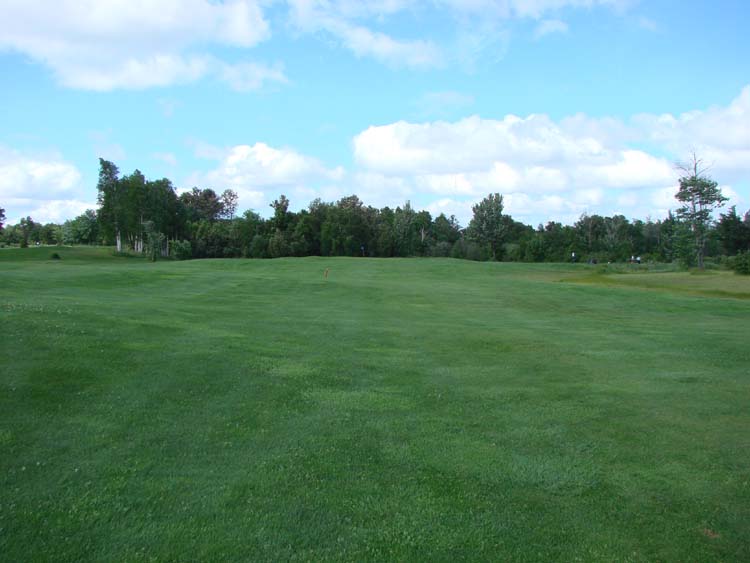 |
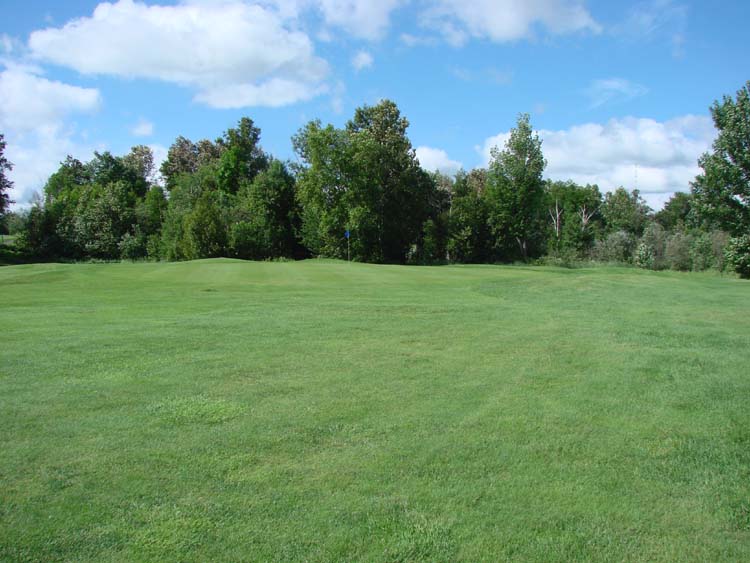
| There is a grass bunker on the left, but as long as you
don't hit the ball too long, you shouldn't be in any trouble. This is
another one of those holes where most golfers find themselves going for a
"chip and a putt" to come up with par. It is a hard hole to land
on, but if you get the right distance and if you are good with your
pitching wedge, you have an excellent shot at a par on this hole. |
 |
| |
|
|
| ON THE TEE |
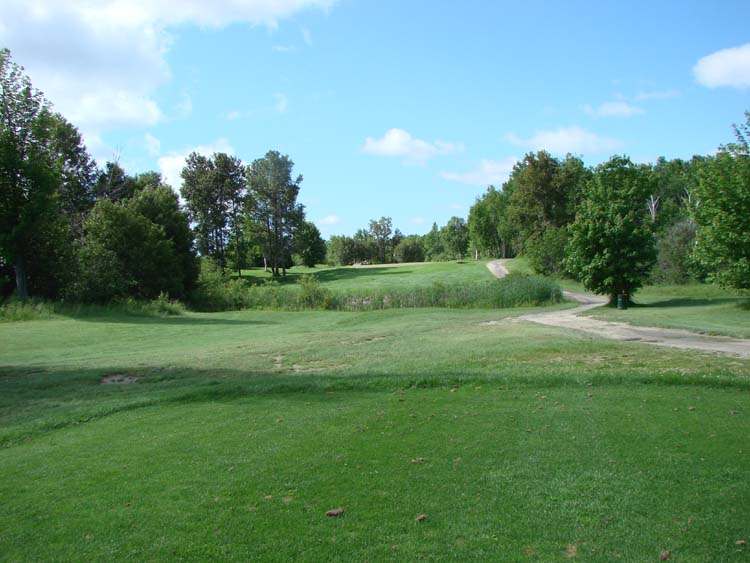 |
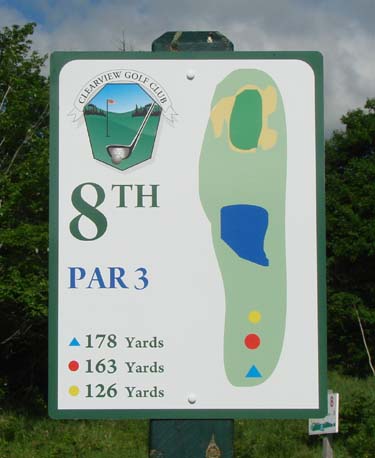
| As you can see from the following photos, the 8th hole is a
beauty. The green is large and has bunkers on both sides. However, most
golfers either come up short or hit the green. Because the hole is up on a
hill, many golfers select the wrong club and either overshoot the hole or
come up short. |
 |
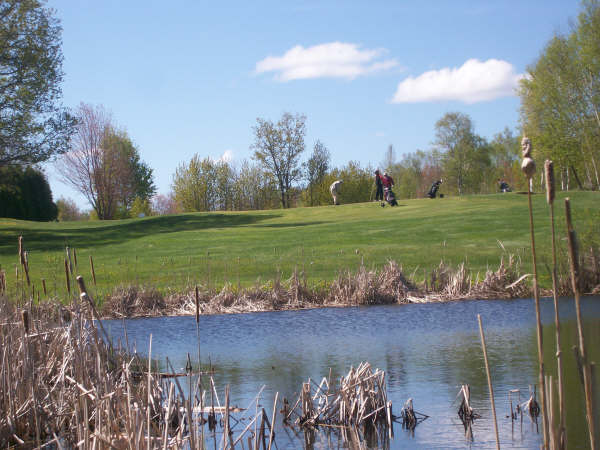 |
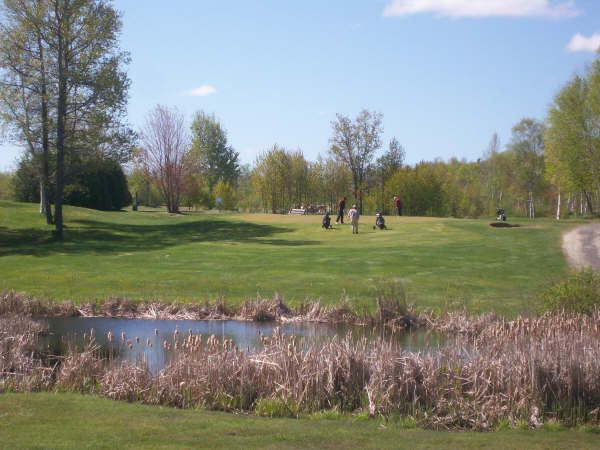
 Once you are around the green you have a good shot at the
pin. This is a hole that many people find easy to par. However, a word of
caution. The green slopes back towards the tee, so if you happen to be
long on the back portion of the green and the pin placement is near the
front, you may find yourself rolling right off the green. This is a hole
that requires a lot of thought and careful management. Once you are around the green you have a good shot at the
pin. This is a hole that many people find easy to par. However, a word of
caution. The green slopes back towards the tee, so if you happen to be
long on the back portion of the green and the pin placement is near the
front, you may find yourself rolling right off the green. This is a hole
that requires a lot of thought and careful management. |
 |
| |
|
|
| ON THE TEE |
 |
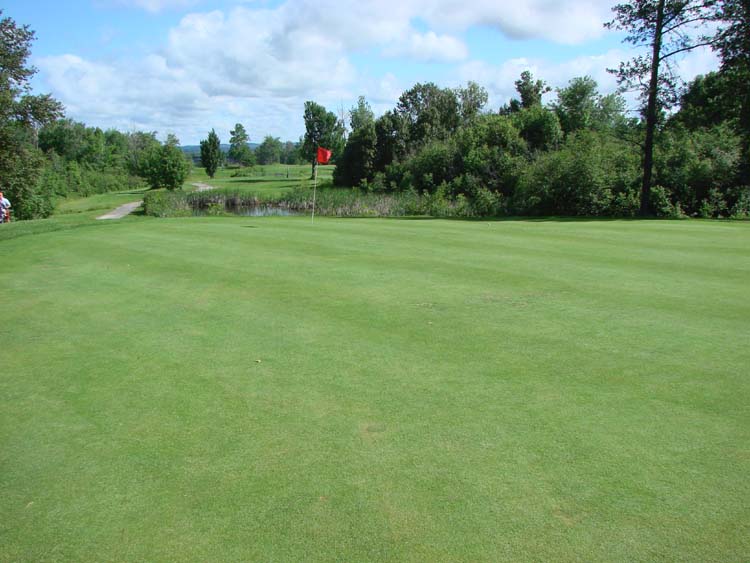
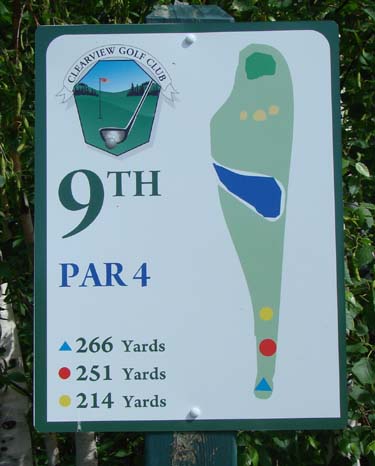
| This is a great finishing hole for your front nine. The
best thing to do is play it safe and hit your drive 180 yards or so over
the water hazard and on to the large landing area in front of the green so
that you get a view such as the one below. |
 |
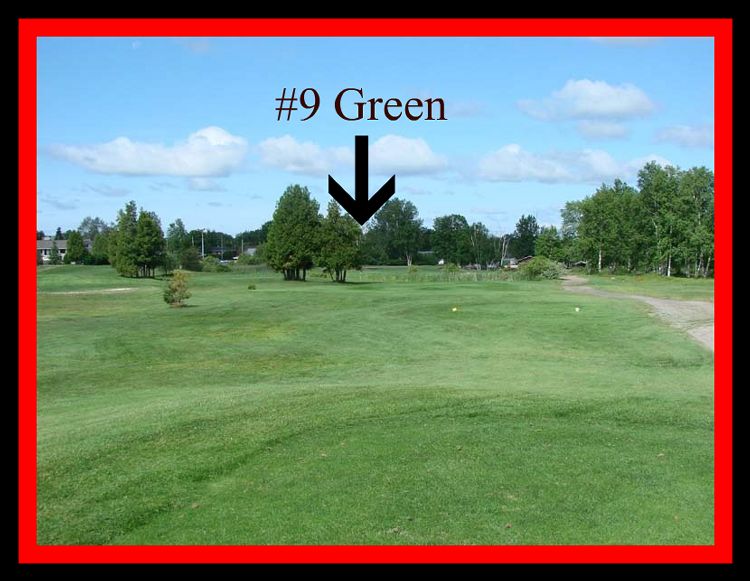
 That leaves you with an easy chip to the putting surface
where you can easily get down in two and walk away with your par. That leaves you with an easy chip to the putting surface
where you can easily get down in two and walk away with your par.
However,
this is another one of those holes that "tempts you" to take a
risk. Long ball hitters can actually hit the green with their drive, so
they often take a chance and play with danger. Danger, indeed is all around this
hole. You are out of bounds on the right. You have water on the left and
you have two bunkers protecting the green. Go for the hole and you stand a
chance of coming away with a birdie or a bogie or double bogie. If
you need to gain some strokes on your round, you can go for broke here.
However, the best way is to manage the hole well and try to chip close
enough for a long attempt at birdie.
|
 |
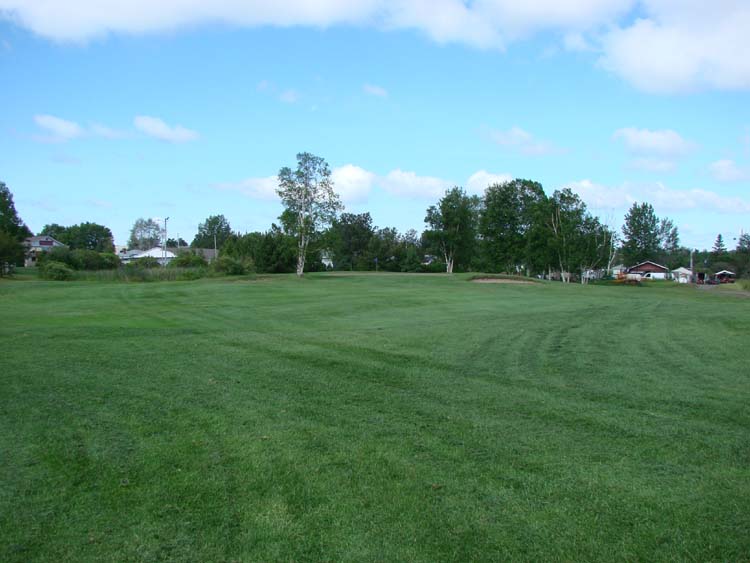
| NINTH GREEN |
 |
| TO THE CLUBHOUSE |
 |
| |
|
|
FOR A PHOTO TOUR AND
ANALYSIS
OF THE BACK NINE
 |
|
|
|
|
|