|
|
WELCOME TO OUR PHOTO TOUR
&
HOLE-BY-HOLE ANALYSIS
of
THE BACK NINE
|
|
| |
 |
|

|
| |
|
FOR A PHOTO TOUR AND
ANALYSIS
OF THE BACK NINE

|
|
|
|

|
| WAITING TO MOVE TO THE 10TH TEE |
 |
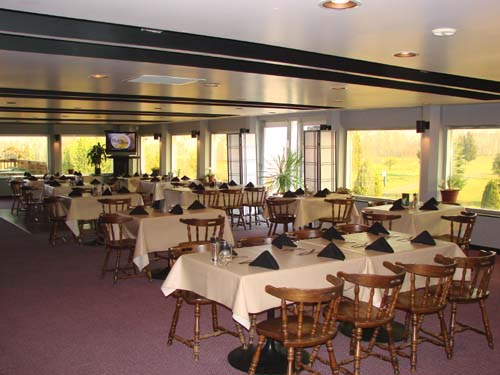
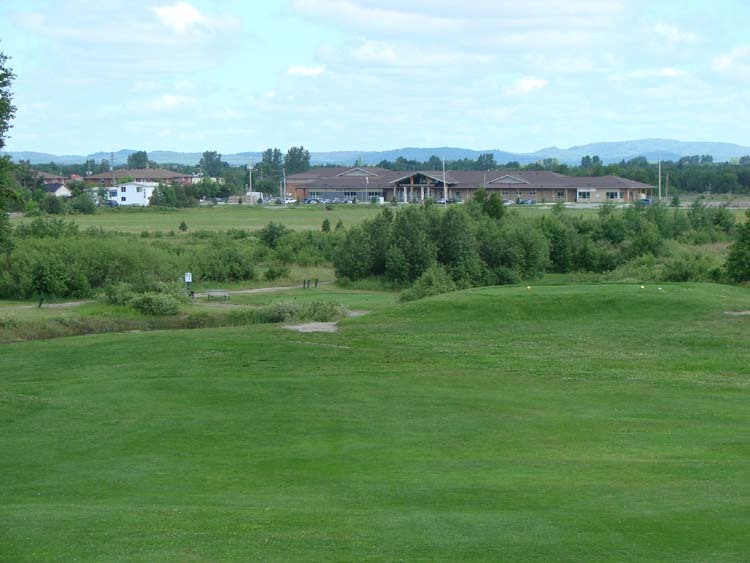
 The view from the outside balcony of the Grill Marks Bistro provides
spectators with a great vantage point from which to watch golfers play the
10th hole.
The view from the outside balcony of the Grill Marks Bistro provides
spectators with a great vantage point from which to watch golfers play the
10th hole.
After playing the Front Nine, many golfers stop over for a 30
or 40 minute break to get out of the hot sun and enjoy some refreshments
and snacks in the Bistro or on The
Grill Shack Patio.
|
|
|
| ON TO THE TEE |
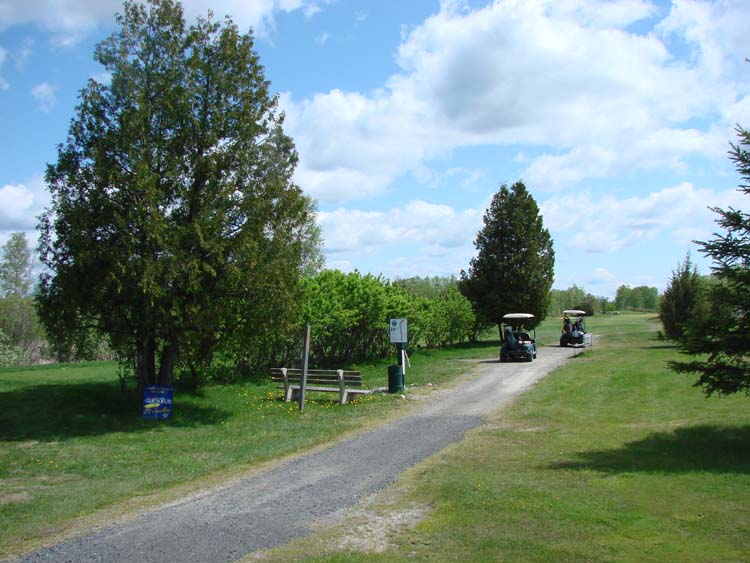 |
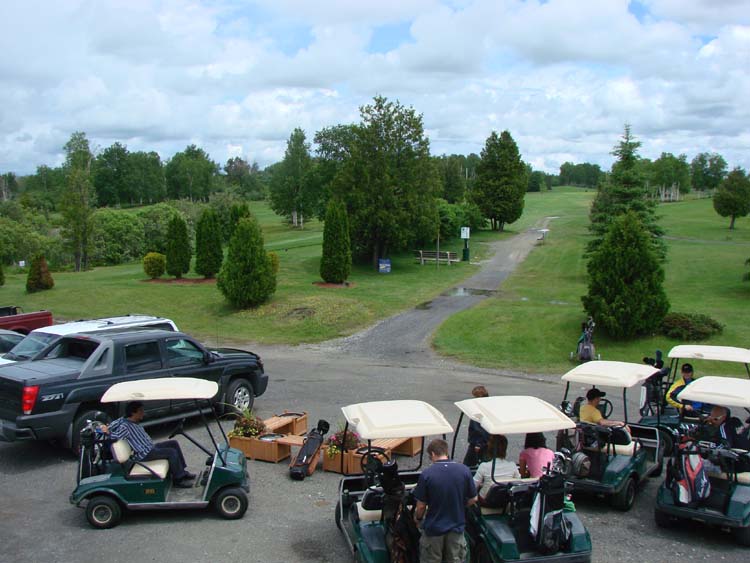
 The cart path and warm-up area for the tenth hole provide
an excellent venue for golfers to begin the back nine. As you can see from
the photos above and below, there is plenty of room to get the carts ready
and when you step on to the tee you immediately find yourself getting into
the mood for golf. It is as picturesque as they come for the beginning of
the back nine. The cart path and warm-up area for the tenth hole provide
an excellent venue for golfers to begin the back nine. As you can see from
the photos above and below, there is plenty of room to get the carts ready
and when you step on to the tee you immediately find yourself getting into
the mood for golf. It is as picturesque as they come for the beginning of
the back nine. |
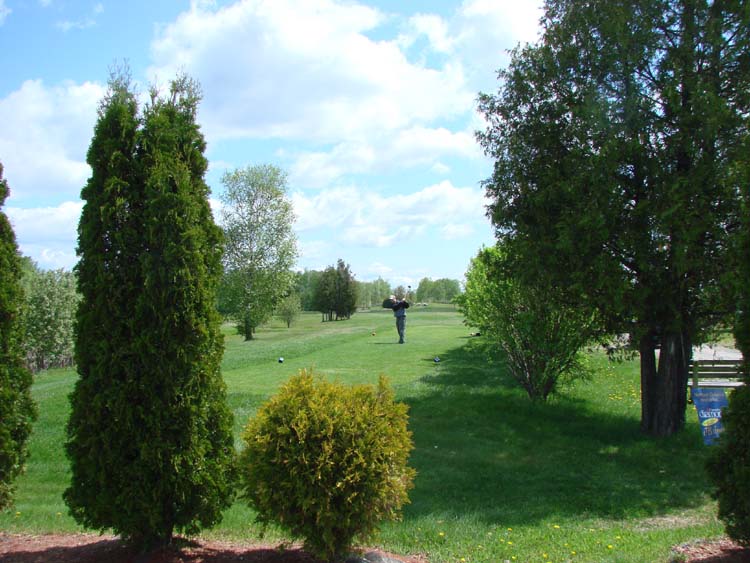 |
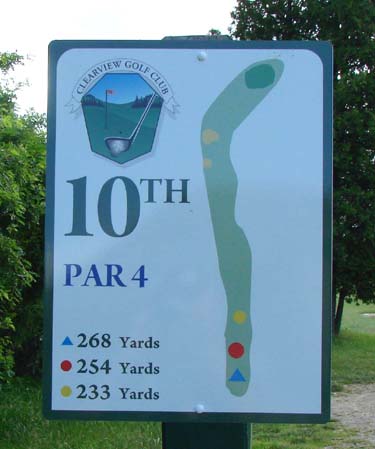
| ON THE TEE |
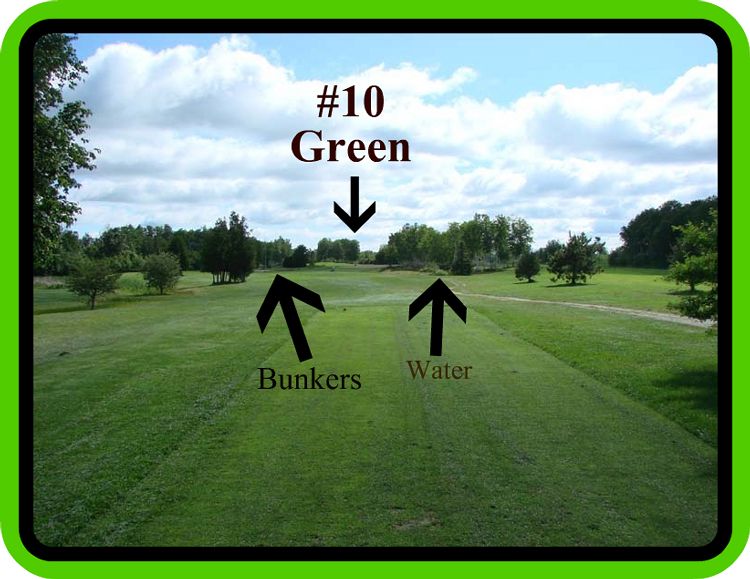 |
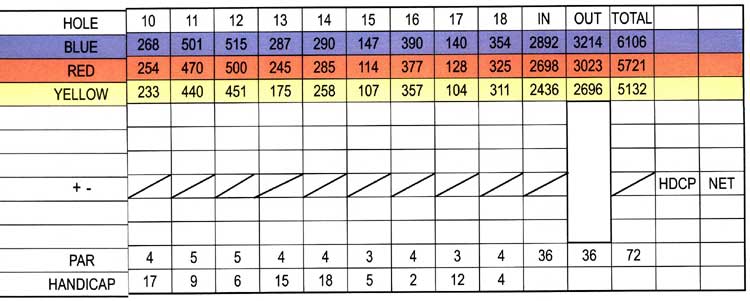
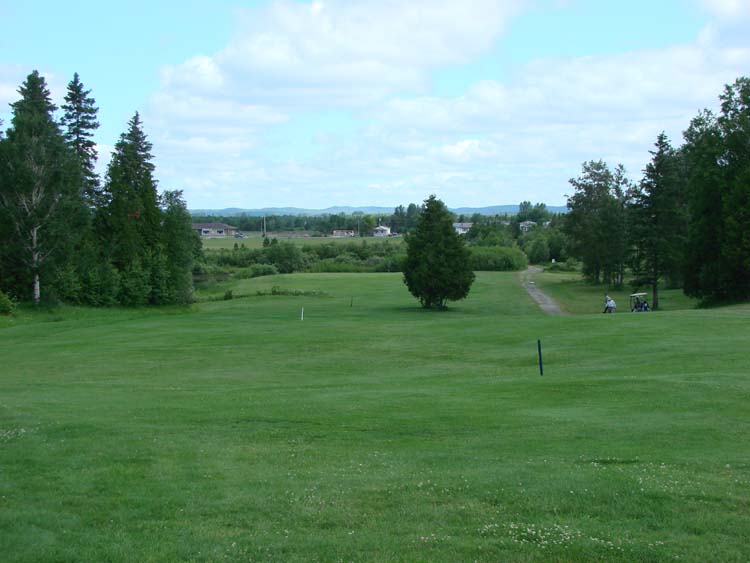
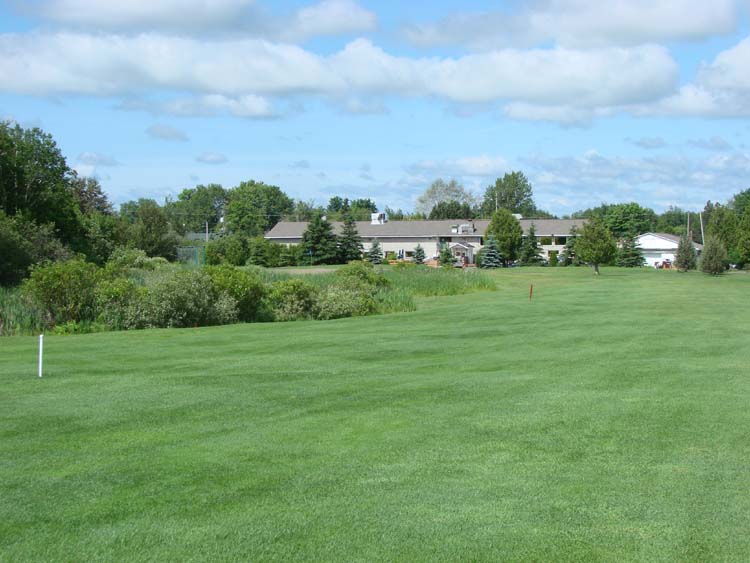
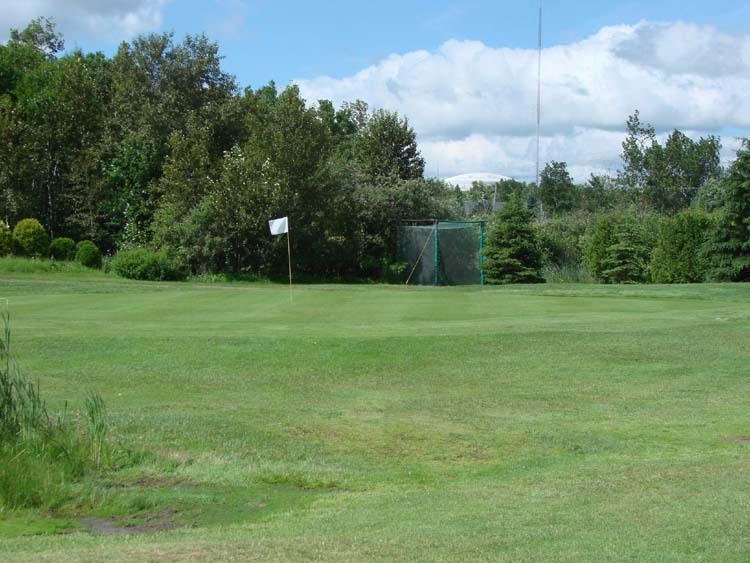
 This is one of the easiest holes on the course, if you are
careful with your game management. It is a hole that is easy enough to
par, but the long-ball hitters will be tempted to "go for the
green" since it is only 254 yards away. Beware of the fact that
it looks a lot closer when
you are on the tee and with the new drivers in many golfers' bags, a lot
of people can easily be fooled into thinking they can reach it in one and
be putting for an eagle. This is one of the easiest holes on the course, if you are
careful with your game management. It is a hole that is easy enough to
par, but the long-ball hitters will be tempted to "go for the
green" since it is only 254 yards away. Beware of the fact that
it looks a lot closer when
you are on the tee and with the new drivers in many golfers' bags, a lot
of people can easily be fooled into thinking they can reach it in one and
be putting for an eagle.
Be forewarned that many a good round turned
sour when an errant shot caught the trees to the right or landed in the
small water hazard just in front of the trees. It is best to aim for the
middle or just to the left of the fairway. Too far right and your ball
will bounce into the water hazard or into the trees where things get a
little dicey in seeing your target. Yet again, hit the ball too far and
over to the left and you find yourself in one of the two bunkers that come
into play just to the front and left of the green.
|
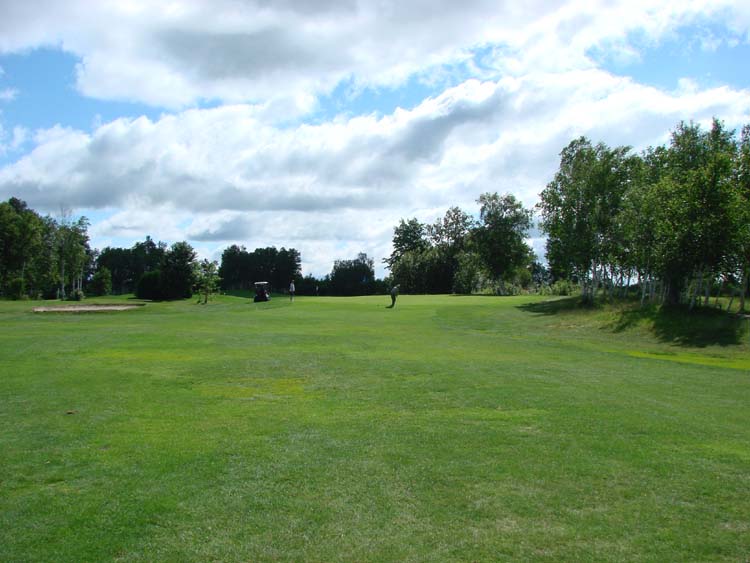 |
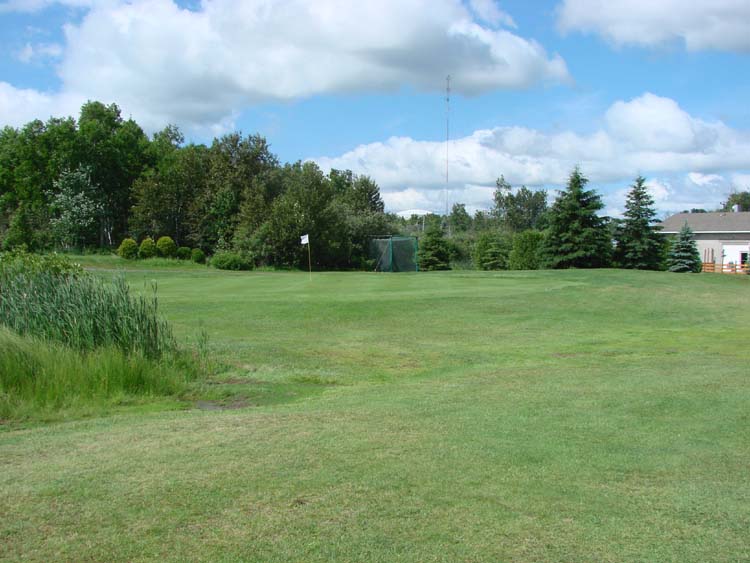
 The safest way to play this hole is to plan on laying up in
front of the green, right down the middle, leaving yourself a shot wedge to the putting surface. The safest way to play this hole is to plan on laying up in
front of the green, right down the middle, leaving yourself a shot wedge to the putting surface.
Do this and you will be like most golfers who are hitting an approach shot of less than 60 to 70 yards to a
green that slopes towards you.
By laying up you avoid the bunkers and have
a better chance of avoiding the bad bounces that await you on the right.
|
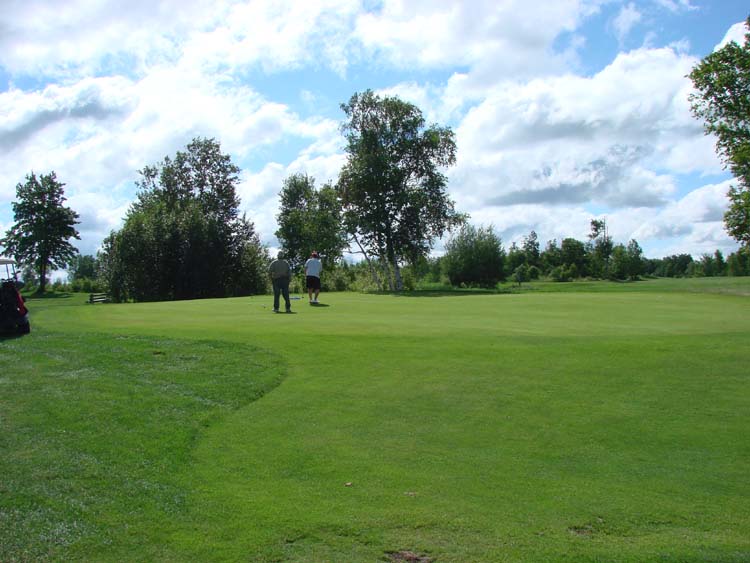 |
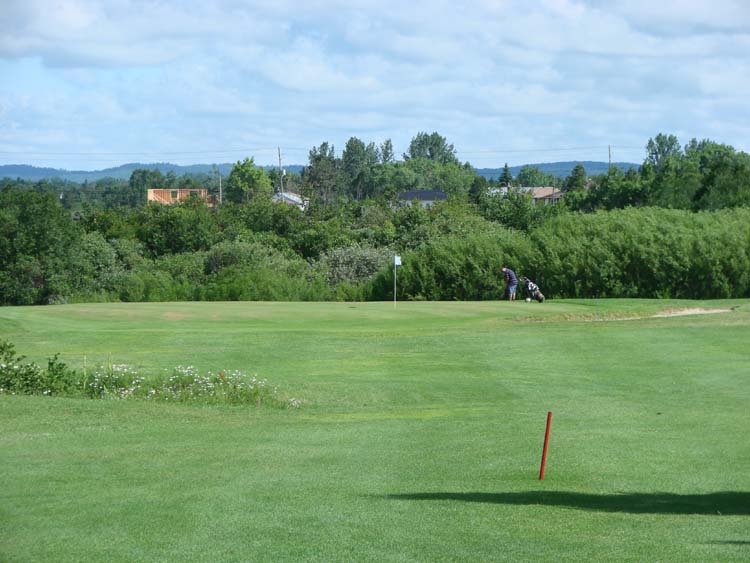
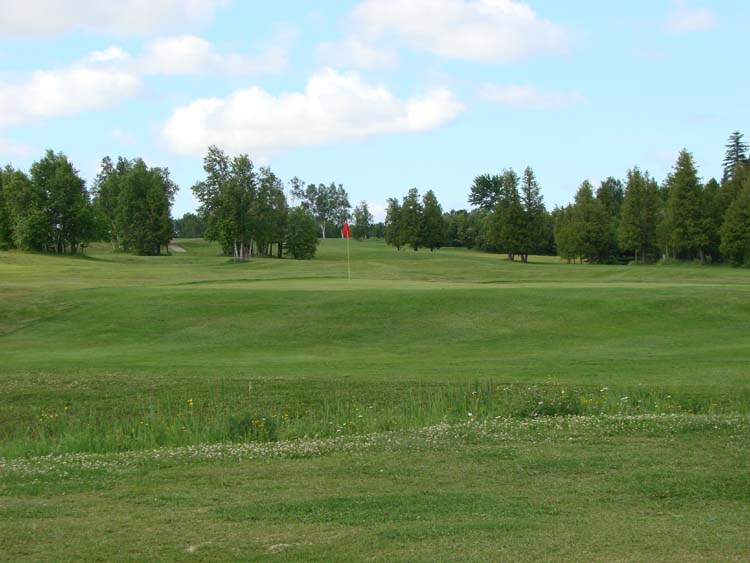
 Your best hope for a par or birdie is to land just below
the hole, no matter where the pin is placed. If you go above the hole or
behind the green, you will have a difficult time staying up on the green.
The slope is quite pronounced (it is hard to tell from the photo) and a
ball that goes by the hole from above tends to keep right on rolling. Play so that you are putting
your approach to the hole up hill and you should get out of this hole
with an easy par and feel good about your start to the back nine. Your best hope for a par or birdie is to land just below
the hole, no matter where the pin is placed. If you go above the hole or
behind the green, you will have a difficult time staying up on the green.
The slope is quite pronounced (it is hard to tell from the photo) and a
ball that goes by the hole from above tends to keep right on rolling. Play so that you are putting
your approach to the hole up hill and you should get out of this hole
with an easy par and feel good about your start to the back nine. |
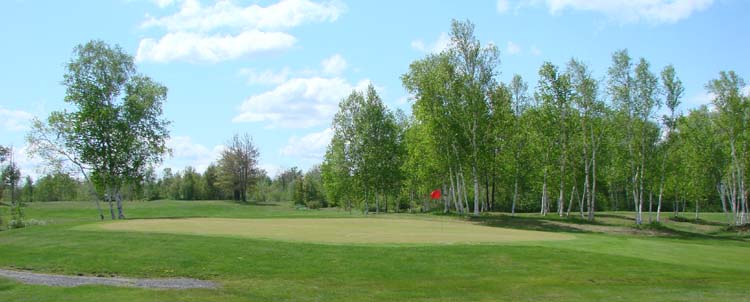 |
| As you can see from the side angle shot, if you end up in
the trees to the right of the green, you will have a hard time getting
anywhere near the hole coming out. Play your first shot safe; take a wedge
from about 40 to 60 yards to the green in two, landing below the cup; and
you should come out of there with a birdie or a par. This is one of the
easiest holes if you avoid trouble. |
|
|
| ON THE TEE |
 |
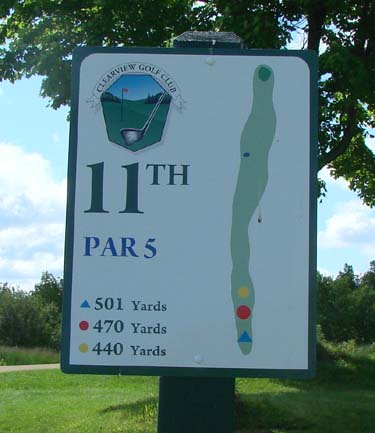
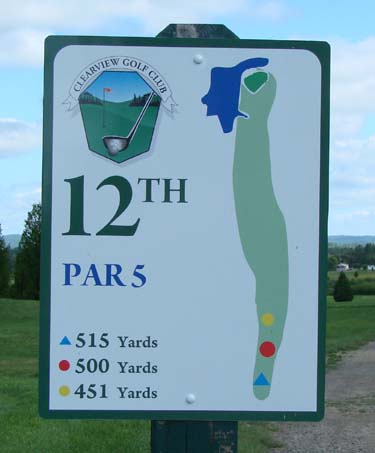
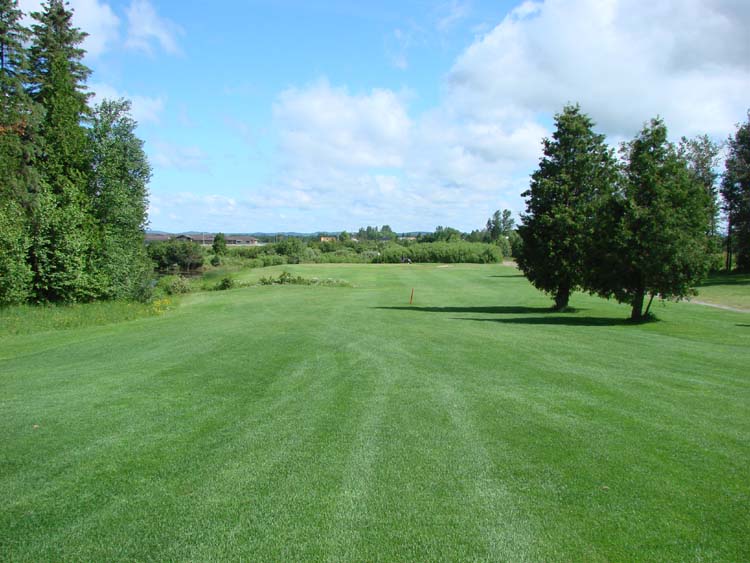
| The par 5 eleventh hole is indeed a hole where you can
"let it all out" with your driver. And many a golfer has done
just that!
 In other words, they have tried to over-power the shot and
found themselves smack dab in the middle of the bushes on the right or
hooking badly to the left, landing in a lot of mess just beyond the trees
on the left, or in the middle of the 7th Fairway. In other words, they have tried to over-power the shot and
found themselves smack dab in the middle of the bushes on the right or
hooking badly to the left, landing in a lot of mess just beyond the trees
on the left, or in the middle of the 7th Fairway.
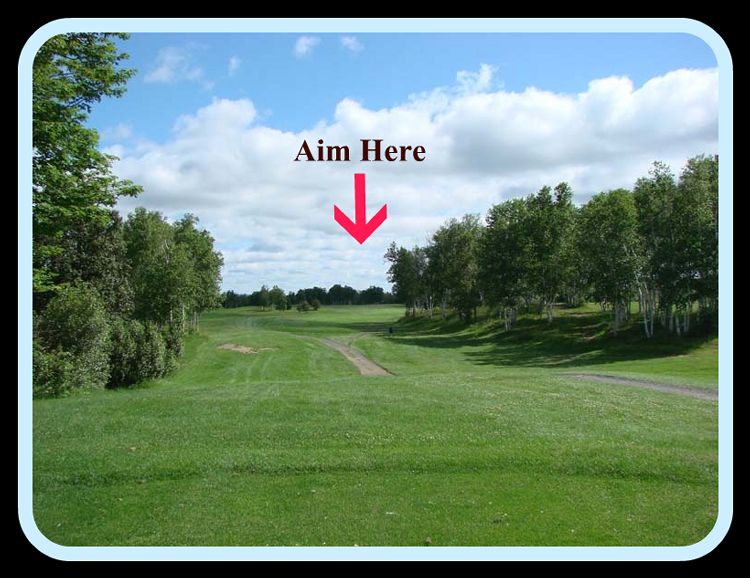
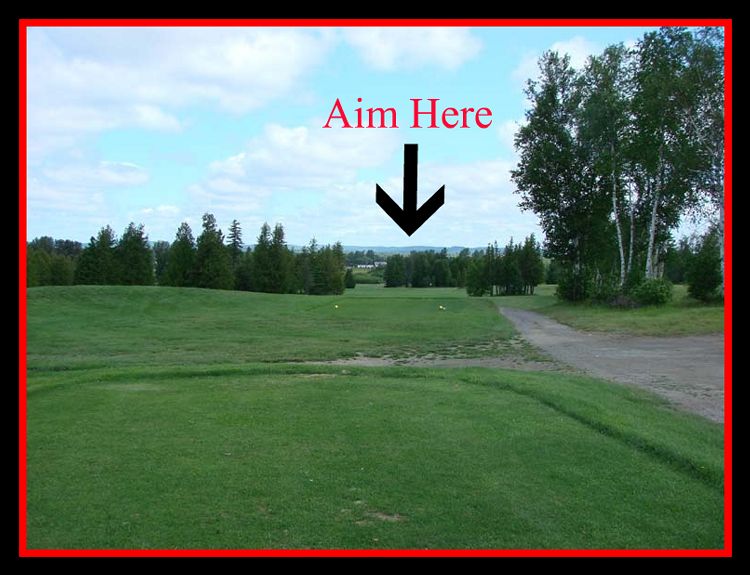
This is one of those holes that allows you to
easily make it up to the putting green in regulation, so take your time
and hit the ball solid, but carefully. The best place to aim is just to
the left of the trees to the right.
You can see a clump of trees in the middle of the opening in the photo
above. Try to aim someplace in between those trees and the trees on the
right and you should end up in good shape. See where the red arrow is
placed. There is plenty of open fairway beyond
the trees and you will have an excellent approach to the green. Many
golfers try to hit right up the middle of the clumps of trees and even
with a good shot find themselves in fairly long fairway rough, making for
an extremely tough second shot. The fairway goes to the right on this
hole.
|
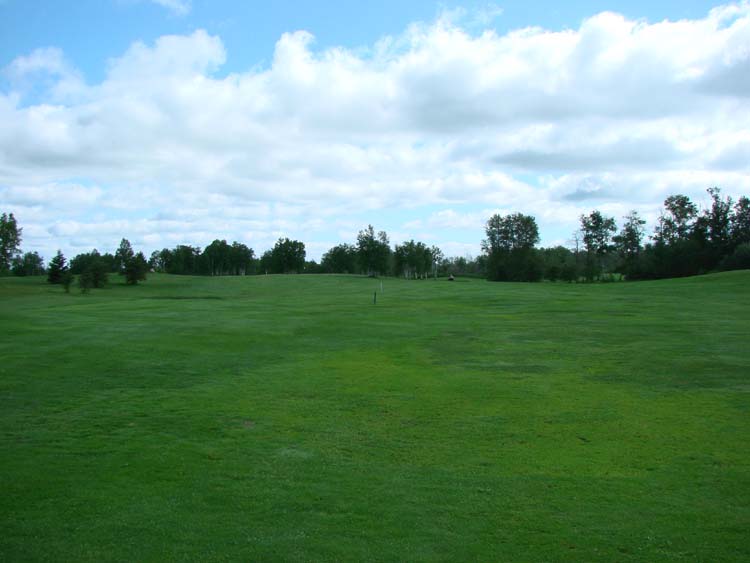 |
 If you land on the fairway just beyond the trees on the
right, you have a perfect view of the rest of the hole. As you can see, it
is a very friendly hole. Even if you come up with a bad shot and find
yourself on the 7th fairway, your second shot should bring you very close to the
putting surface. Many golfers find themselves either just to the right or
left of the green or even overshooting it a bit with their second. Average
golfers find a driver and three wood bring them close enough to the green
for a short pitch to the putting surface. If you land on the fairway just beyond the trees on the
right, you have a perfect view of the rest of the hole. As you can see, it
is a very friendly hole. Even if you come up with a bad shot and find
yourself on the 7th fairway, your second shot should bring you very close to the
putting surface. Many golfers find themselves either just to the right or
left of the green or even overshooting it a bit with their second. Average
golfers find a driver and three wood bring them close enough to the green
for a short pitch to the putting surface. |
|
|
 You can't get into much trouble around this green, so feel
free to "let 'er rip" with your second shot. Even if you are
hitting from 150 yards out on your 3rd shot, you may have a good chance of
landing the green in regulation. However, two average shots will leave you
with less than 70 yards to the green in three. You can't get into much trouble around this green, so feel
free to "let 'er rip" with your second shot. Even if you are
hitting from 150 yards out on your 3rd shot, you may have a good chance of
landing the green in regulation. However, two average shots will leave you
with less than 70 yards to the green in three.
Notice the tall trees to the right of the green. Try to avoid them. If
anything, aim so that your ball ends up to the left of this green, leaving
you on the same level. If you go right, you will roll down a hill and be
putting up hill from a lie that doesn't give you a very good view of the
cup placement.
|
|
| The eleventh green is a good size and it is one of the
easier greens for putting. Just get your ball on the green and you should
at least get the ball down in two. Just try not to overshoot the green by
much, if any. There is a slight hill and long grass beyond the hole, which
makes it difficult to get your next shot close to the hole. |
 |
| Looking back from the green you can see how wide open this
fairway actually is. Once you shoot out of the tree clusters you are on
open ground all the way to the tee. |
|
|
| ON THE TEE |
|
|
 One of the things you will notice about Grill Marks
Clearview is that it "tempts" the good golfers. One of the things you will notice about Grill Marks
Clearview is that it "tempts" the good golfers.
This hole is no
different.
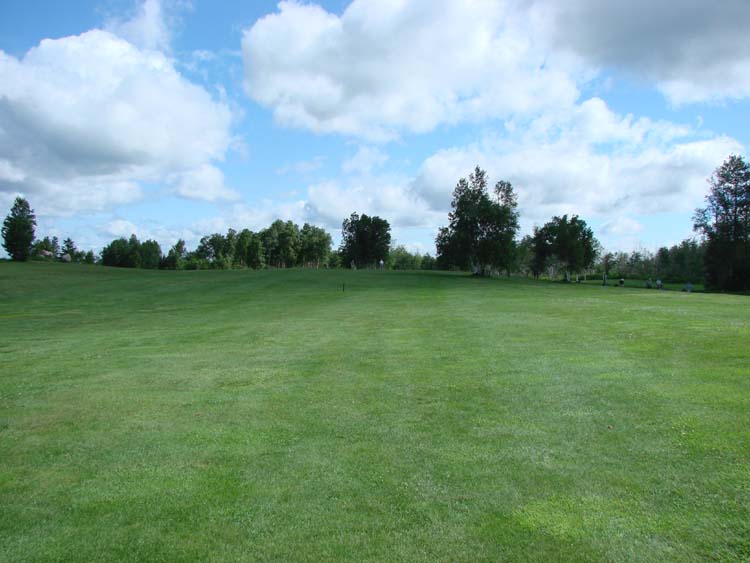
Standing on the tee looking out over this 500 yard par 5 gives
you a sense that you can hit the ball forever. However, many a ball has
been lost among the trees on the left after an overpowering driver went
awry. Your best bet on the twelfth hole is to strike the ball hard and
right up the middle of the two clusters of trees you see on the fairway.
The small cluster of trees on the right down the fairway is easy to clear
for most heavy hitters. Once you go past those trees you are in good
position to take your second shot. Put the ball closer to the trees on the
left and you are in trouble. You can clear the trees on the left with a
super shot, however, once you go past the trees you could easily end up
with challenges from the long rough. Just beware that very few golfers can
"clear" the trees on the left. Therefore, aim so that your shot
is going to keep clear of those trees.
|
 |
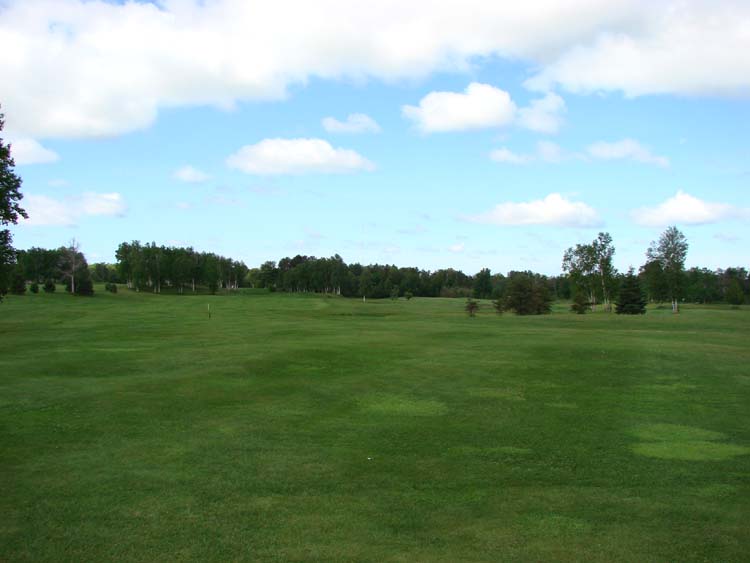
 A good tee shot will leave you with a second shot that is
almost 300 yards to the green. Long ball hitters may find themselves with
only 250 yards left and be tempted once again to "go for the
green". A good tee shot will leave you with a second shot that is
almost 300 yards to the green. Long ball hitters may find themselves with
only 250 yards left and be tempted once again to "go for the
green".
Again, unless you are a very accurate shooter, there is
trouble all around this green. A ball hit off to the left is going to get
wet. A ball hit to the right is going to get wet. A ball hit too long is
going to get wet. And there is a bunker just in front of the green on the
right hand side. Hit the ball so that it goes over the tree
in the middle of the fairway and you should be in a good position to chip
on to the green in three. If you are worried about getting into trouble,
hit to the left of the tree and you will only be 100 yards from the hole.
|
 |
| Many golfers try to land in this area on their second shot.
That leaves you with a straight on wedge or nine-iron shot to the green
and you can pretty well avoid water or sand trouble. You will only be
about 150 yards or less away. Far enough for a challenging approach, but
close enough to be able to use an iron that you can control to stay out of
trouble. |
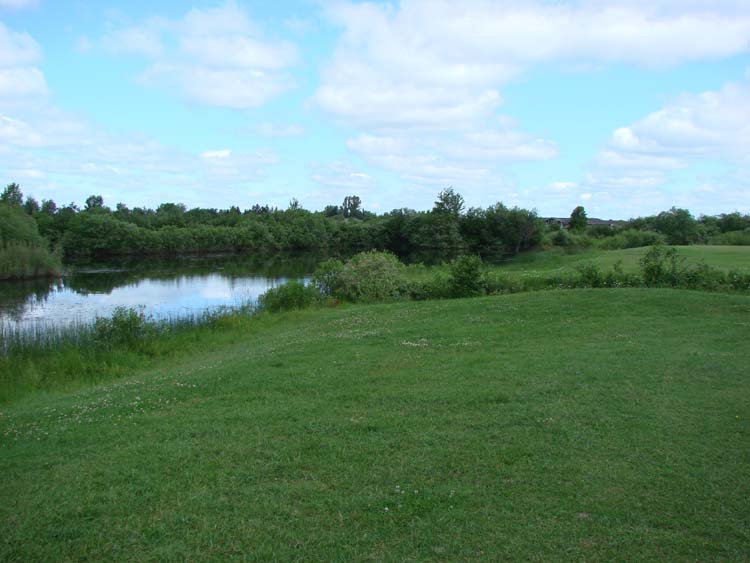 |
 The pond to the left is trouble and very easy to hit from
far out. The pond to the left is trouble and very easy to hit from
far out.
Don't even think of flirting with danger here unless you are
prepared to take a penalty stroke.
|
 |
|
From the 100 yard marker beside the tree, you have a beautiful approach
and should easily be going for your par on this hole.
Many people find
that they come up with par even when chipping on the green in four. If you
land to the front left of the green you have a nice approach to the cup
and can often go up and down to save par.
|
|
|
| ON THE TEE |
 |
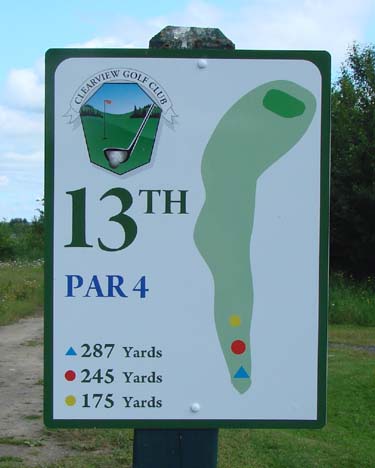
 This can be one of the most dangerous holes on the course
for the long-ball hitters. The safest way to play the 13th is to hit your
ball towards the left of the tall trees in the middle of the photo. A good
3-wood or 3-iron will put you in a nice fairway with a good view to the
hole. A word of caution - don't hit the ball too far to the left or you
will find yourself in pretty nasty rough. This can be one of the most dangerous holes on the course
for the long-ball hitters. The safest way to play the 13th is to hit your
ball towards the left of the tall trees in the middle of the photo. A good
3-wood or 3-iron will put you in a nice fairway with a good view to the
hole. A word of caution - don't hit the ball too far to the left or you
will find yourself in pretty nasty rough.
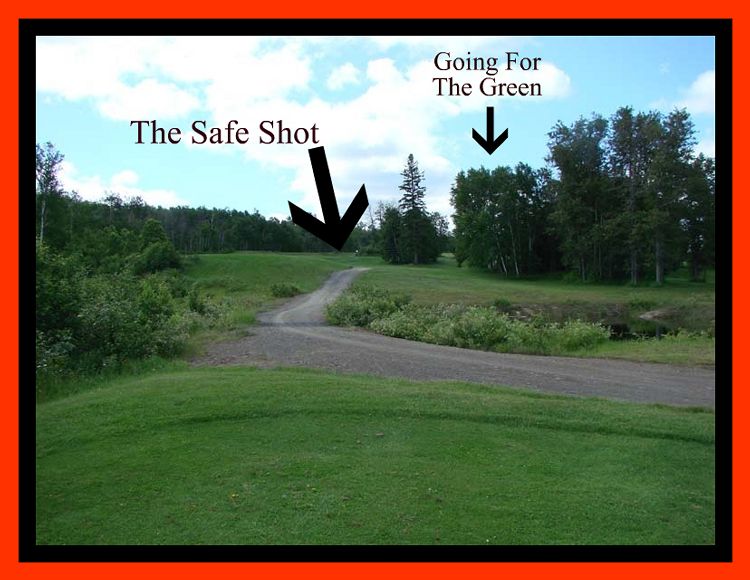
The "daring golfers" will often take out their big driver and
to over the trees straight at the hole. If you can hit the ball a good 250
yards in the air, you can clear the trees and end up in good shape (if you
can find your ball). The best way to play it over the trees is to aim
for the "flat top" trees just to the right of the "tall
single tree" in the middle. You can see how the flat top is bordered
by the tall single tree on the left and the cluster of tall trees on the
right. A ball that sails over that flat top and which is capable of
carrying 250 yards or more, could end up pretty close to the hole. |
| LOOKING BACK FROM THE FAIRWAY |
 |
| This is a very pretty hole when you look back to the tee
from the "safe" landing area. As you can see, there is lots of
room and the grass is easy to hit. |
| TO THE GREEN |
 |
 From the "safe" area you should be able to
approach the green without much trouble. However, as you can see, this is
not an easy green to hit and stick. The green actually rolls
"away" from your approach. Therefore, the best way to approach
this green is to land on the mound in front and bounce on to the green.
However, if you come up short, you won't make it to the putting surface.
Hit to the right of the hole and you may find yourself in the grass
bunker. If you land on the green in the air, chances are that you are
going to roll off on the back side of the green. From the "safe" area you should be able to
approach the green without much trouble. However, as you can see, this is
not an easy green to hit and stick. The green actually rolls
"away" from your approach. Therefore, the best way to approach
this green is to land on the mound in front and bounce on to the green.
However, if you come up short, you won't make it to the putting surface.
Hit to the right of the hole and you may find yourself in the grass
bunker. If you land on the green in the air, chances are that you are
going to roll off on the back side of the green. |
| THE OTHER SIDE OF THE GREEN |
 |
| This photo shows you the landing area behind the green that
many golfers find when they go over the trees. As you can see, if you land
your drive up around the green, you have little trouble coming away with a
par. |
|
|
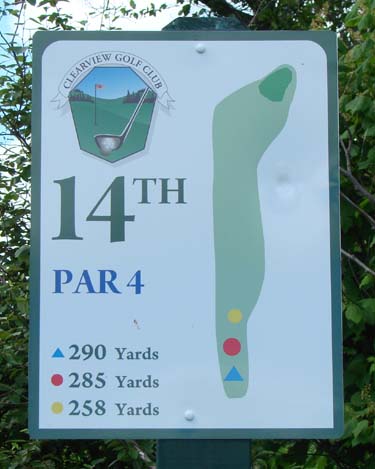
| ON THE TEE |
 |
 This is another long-ball hitter's dream! This is another long-ball hitter's dream!
One of our
members, Mac Bell, actually recorded
a hole-in-one on this hole during a particularly windy day.
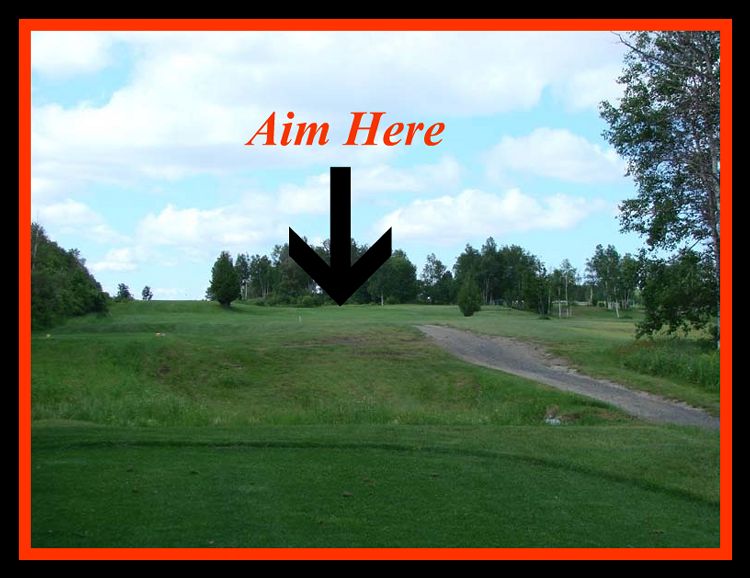
The safest way
to tackle this hole is to hit the ball hard and long, just towards the
left of the flag that you can barely see against the green backdrop of
trees in the distance. Aim to where the arrow is pointing and you should be
giving yourself plenty of room for error.
The danger on this hole is to the right hand side of the fairway. If
you go right you will be chipping back to the green which slopes to the
front and you will also have to deal with the cart path and a mound around
the edge of the green. Stay in front and to the left and you will have a
nice second shot as you can see from the photo below.
|
| SECOND SHOT TO THE GREEN |
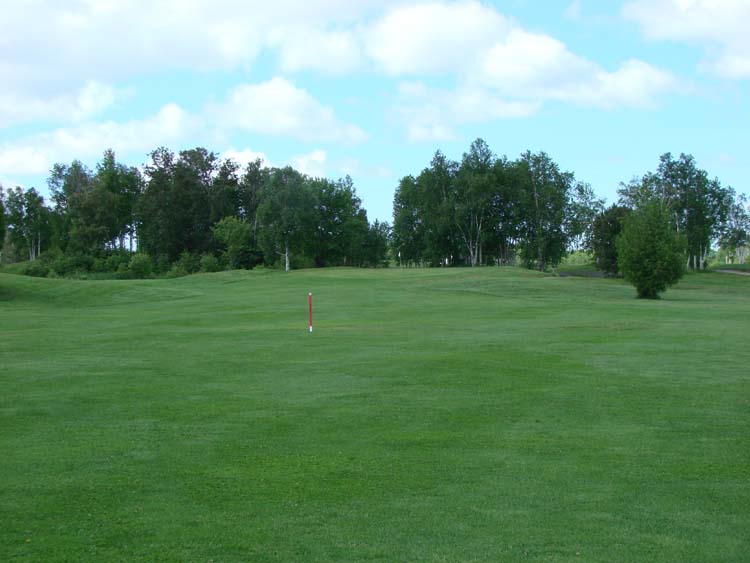 |
 The view from the 150 yard marker shows you why you want to
be in this position as you approach this green. Most golfers will be
hitting a wedge of about 100 or less yards into this green. The view from the 150 yard marker shows you why you want to
be in this position as you approach this green. Most golfers will be
hitting a wedge of about 100 or less yards into this green.
The green is
sloped up hill, so make sure your second shot lands on the green or just
in front of the green and you should stay on the putting surface. Avoid
hitting to the right as you will hit the cart path and roll further tot he
right. It is EXTREMELY difficult to chip back to the green from the right
because of the slope. Hit the ball to the left or over the green and you
could be in some difficulties.
|
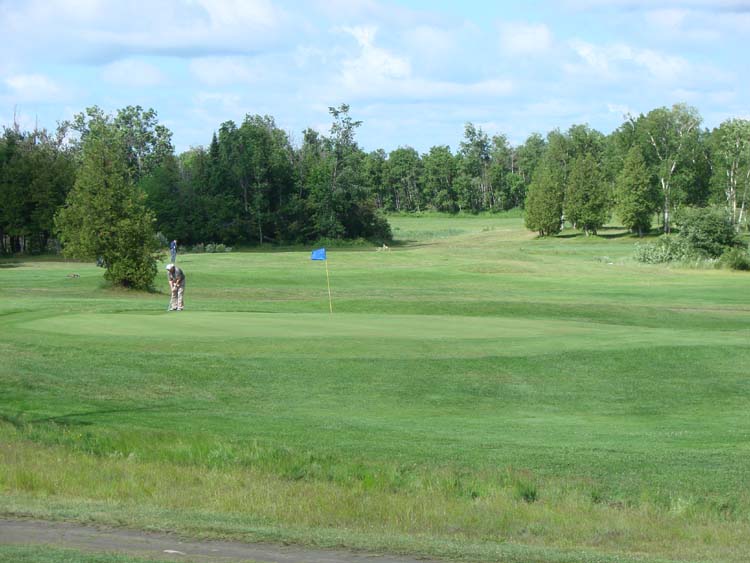
| THE FOURTEENTH GREEN |
 |
 Just take your time and make sure that your approach shot
stays in front of the pin and you should be in a good position to come out
of this with a par. It is not a bad strategy to come up short with your
second shot, leaving a very easy pitch and run to the hole and a tap-in
for par. You will find that this is one of the easiest holes to get
up-and-down with your wedge if you are just off the green. Just remember
to stay in front and below the pin. If you go to the side or past the pin,
you will be facing a very challenging putt. Just take your time and make sure that your approach shot
stays in front of the pin and you should be in a good position to come out
of this with a par. It is not a bad strategy to come up short with your
second shot, leaving a very easy pitch and run to the hole and a tap-in
for par. You will find that this is one of the easiest holes to get
up-and-down with your wedge if you are just off the green. Just remember
to stay in front and below the pin. If you go to the side or past the pin,
you will be facing a very challenging putt. |
|
|
| ON THE TEE |
 |
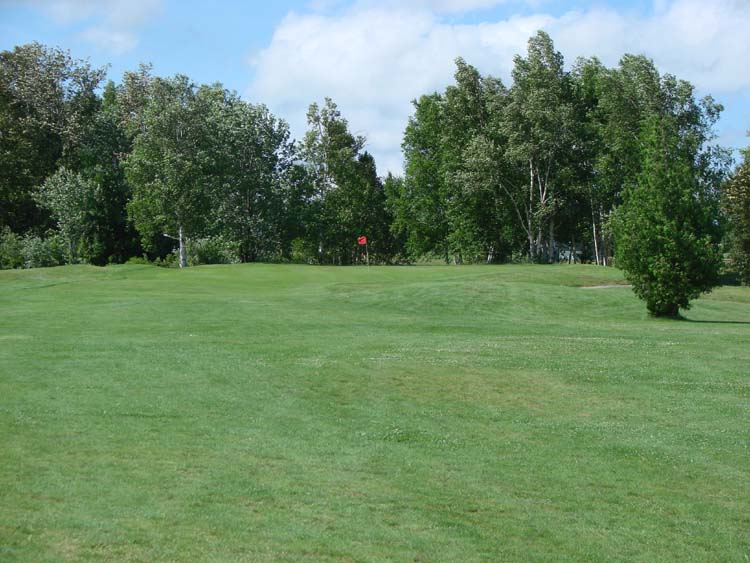
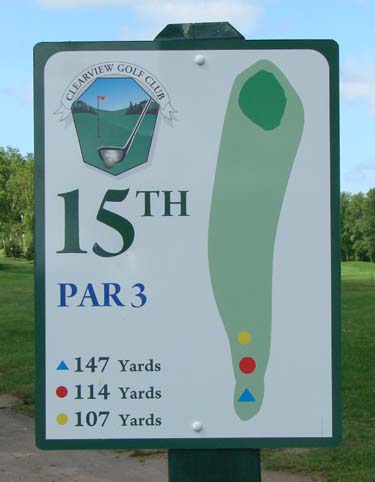
 Don't let the closeness of the 15th fool you. This is one
of the hardest par 3's you will ever come across. While it is only 114
yards away, you are hitting up hill and you MUST be aware of where you are
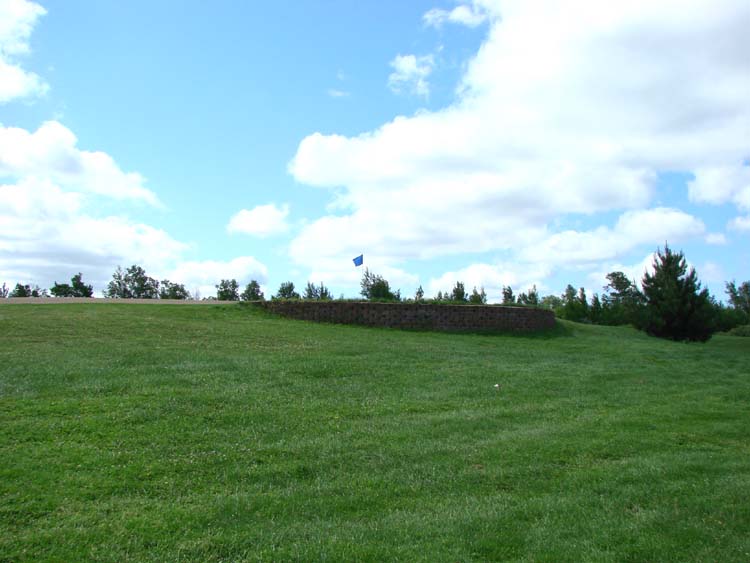
hitting. As you can see from the photo below, there is a brick wall on the
bottom right front of the green. DO NOT hit your ball short and to the
right or this will come into play and you will staring at a
double-bogey. Don't let the closeness of the 15th fool you. This is one
of the hardest par 3's you will ever come across. While it is only 114
yards away, you are hitting up hill and you MUST be aware of where you are
hitting. As you can see from the photo below, there is a brick wall on the
bottom right front of the green. DO NOT hit your ball short and to the
right or this will come into play and you will staring at a
double-bogey.
You want to hit your ball just to the right of the big tree on the left
side of the green.
Forget about the flag. If you aim for the edge of the left side of the
green, even if you go long or short you will be in good shape. This is a
green that will force you to go "up-and-down" with your wedge if
you plan on getting a par. Very few golfers hit this green and stick
because it is shaped like a bowl and is one of the fastest greens on the
course. The tree won't come into play unless you really hit your ball far
left. |
| TO THE GREEN |
 |
|
|
|
|
| ON THE TEE |
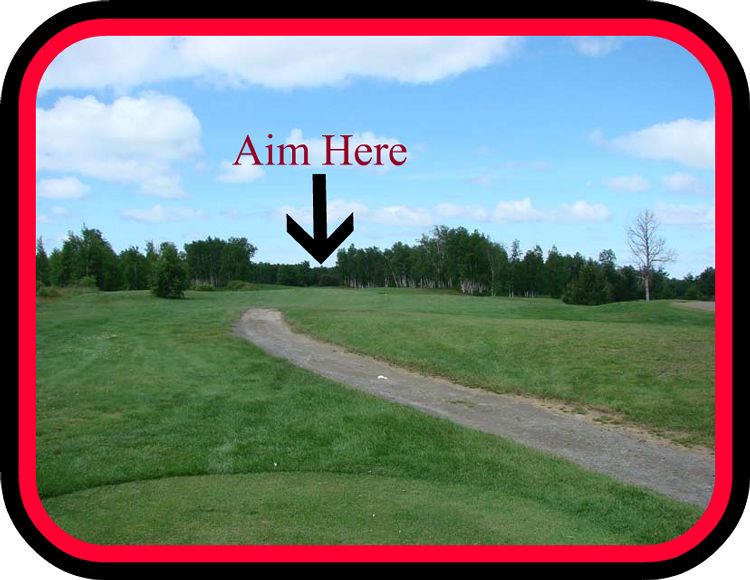 |
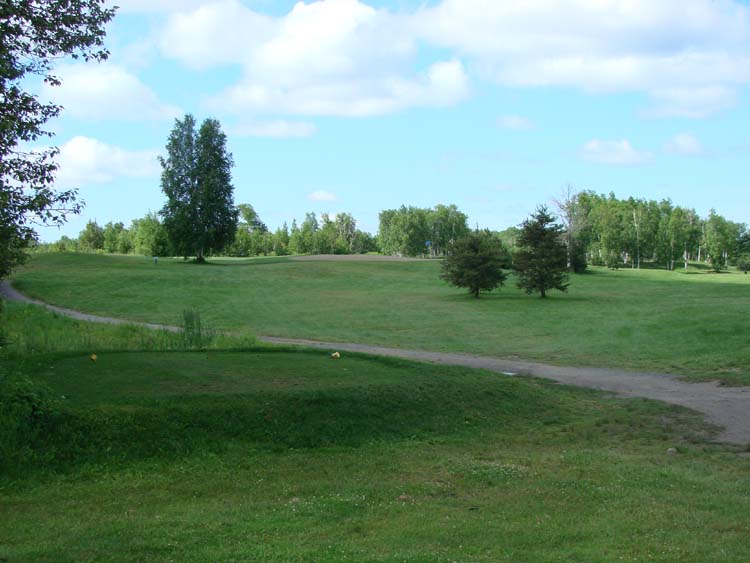
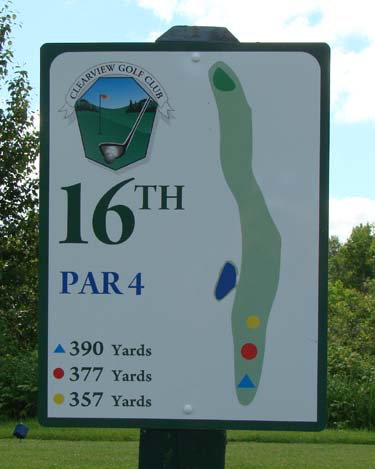
 Look at the photo above and below to get a good
understanding of hoe to play this one. The photo below shows you the part
of the fairway that you can't see from the tee. As you look at the photo
above, you can make out a little hill that hides this landing area from
view. Look at the photo above and below to get a good
understanding of hoe to play this one. The photo below shows you the part
of the fairway that you can't see from the tee. As you look at the photo
above, you can make out a little hill that hides this landing area from
view.
The landing area is beautiful and will
give you a wonderful second shot if you can land here. However, most
golfers pull out the driver and go for broke with this hole, finding
adventure in the trees to the right or the swamp to the left. You can't
score well on this hole if you do either.
In the distance you can see the large cluster of birch trees on the
right. Aim for the arrow in the middle of the photo, just to the edge of the birch
trees and you should do ok. Even the longest of hitters will have trouble
reaching those trees at the edge, so as long as you are accurate with your shot, you
should end up on the fairway with a nice position to go for the green in
two. |
 |
| A LOOK AT THE GREEN FROM THE HILL SIDE |
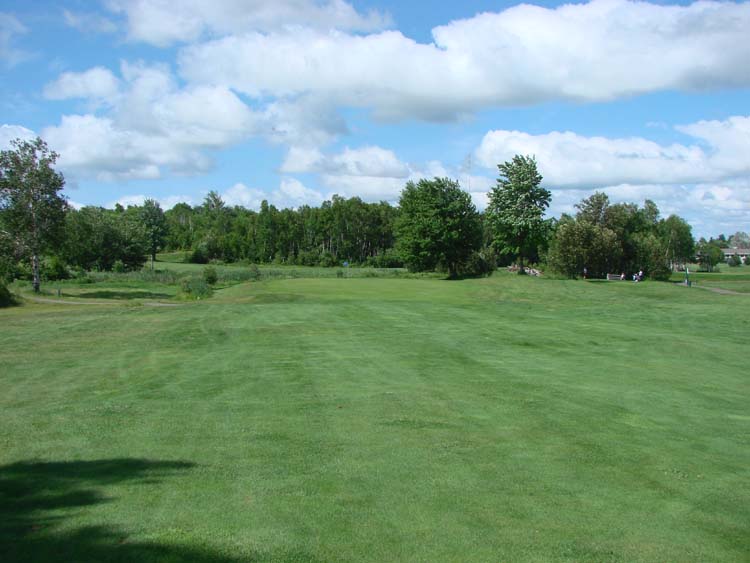 |
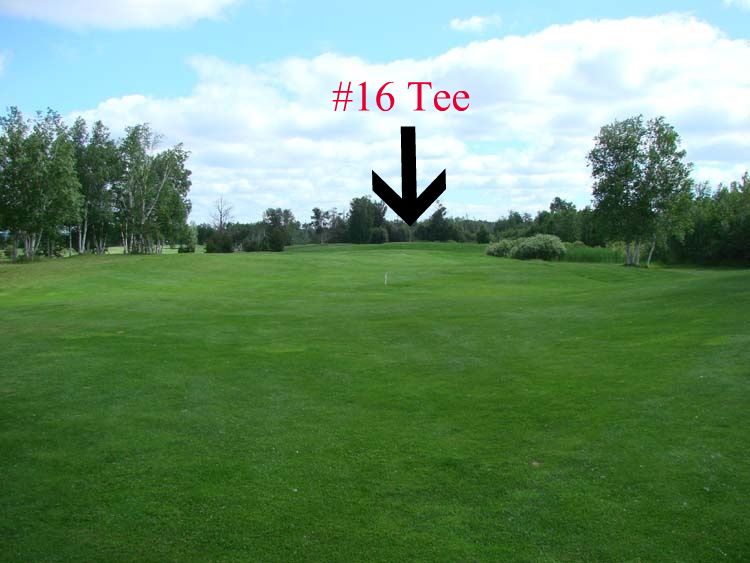
 Very few people ever get to see the green from this point
of view for their second shot. Their third maybe, but it would take a huge
drive to get to the top of the hill overlooking the green. However, if you are going to be hitting for
the green after your drive, you should know what dangers lay ahead. Two
good shots will get you to this green, however, you will be hitting blind
to the green - a dangerous situation at best. Very few people ever get to see the green from this point
of view for their second shot. Their third maybe, but it would take a huge
drive to get to the top of the hill overlooking the green. However, if you are going to be hitting for
the green after your drive, you should know what dangers lay ahead. Two
good shots will get you to this green, however, you will be hitting blind
to the green - a dangerous situation at best.
As you are striking your second shot, try to keep to the right centre
of the hole. You won't run into trouble if you are short and to the right.
Go long and to the left and you will have nothing but grief. And by all
means, don't go over the green. Not only are you in a lot of rough grass,
you will be coming back with a pronounced slope that will take your ball
right off the green.
The best approach is to land on the bottom portion of the green. Even
if you are short, this is another hole that allows you a good opportunity
to go "up-and-down" in two to save a par. |
 |
| |
|
|
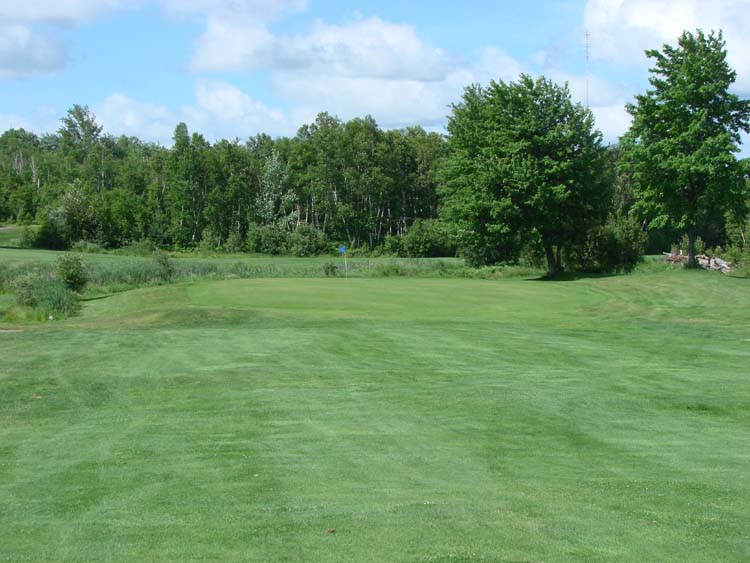
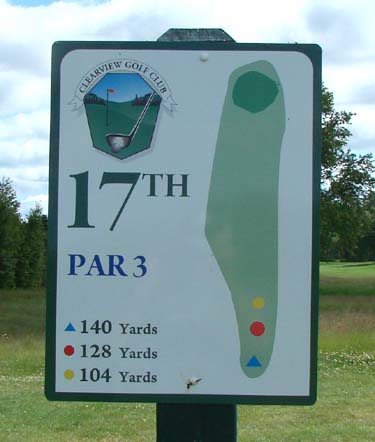
| ON THE TEE |
 |
 This should be one of the easiest holes on the course. This should be one of the easiest holes on the course.
It
is only 128 yards away and there is good grass all around if you don't hit
the green. Just pick the right club and hit right at the flag.
You don't
have a lot of room for error behind the hole, but once again the biggest
challenge you have here is with club selection. |
| THE SEVENTEENTH GREEN |
 |
| |
|

|
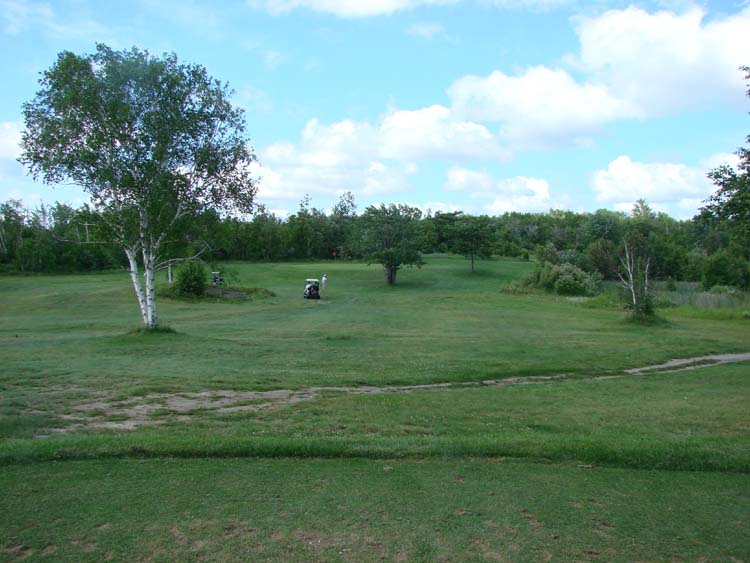
| ON THE TEE |
|

|
 The finishing hole on this course can make or break the
best of golfers. It demands some sound management skills. The finishing hole on this course can make or break the
best of golfers. It demands some sound management skills.
If you have a lot of confidence with your driver, you can hit away
right up the middle. Aim to the left of the birch trees, staying more
right of centre than left of centre to avoid the marsh and you should be
fine.
Even the best shot is going to require a person to go over the marsh
to get to the hole, but if you can hit the ball out at least 250 yards,
your second shot will be easier to get to the putting surface in
regulation.
The big decision for most people here is whether to use the driver or
lay off a bit. Hit you ball a bit longer than 200 yards and you may bring
the marsh and the birch cluster into play. Hit around 180 yards and you
are safe with another 150 or so yards to the green, still giving you a
chance for a par or bogie.
|
 |
 Many golfers play it safe and hit their ball out about 175
to 180 yards. Many golfers play it safe and hit their ball out about 175
to 180 yards.
This leaves you with a 150 yard second shot to the green. When taking
your second shot, you don't want to come up short, so hit it hard.
There is lots of space around the green, and if you go right you have a
nice approach.
|
 |
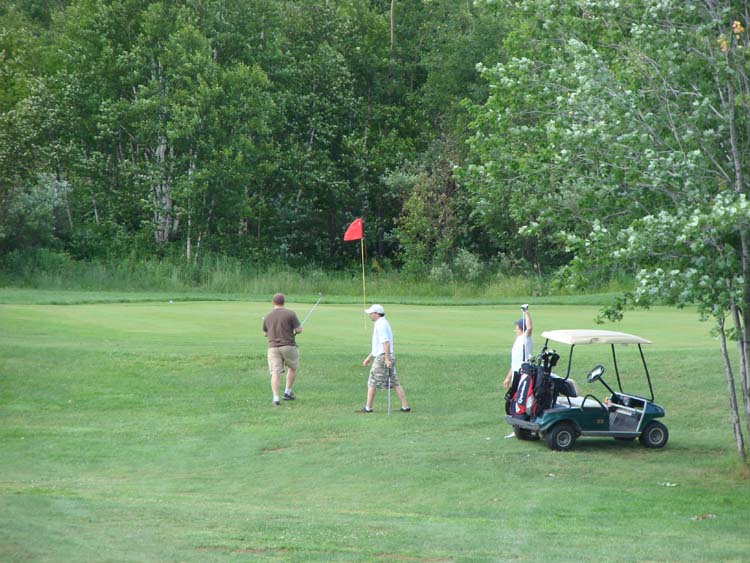
| As you can see from the photos above and below, this is
another green where you have a chance of going up and down in
two with a good wedge shot. However, it is one of the most difficult on
the course to par because of the trouble all around it.
Even most golfers who land on the green in
regulation are facing a long putt for birdie and usually end up
three-putting.
Land near the green in two, then take a nice easy wedge to the hole and
you will come out of the round feeling good with a par or bogie.
|
 |
| TO THE CLUBHOUSE |
 |
| The clubhouse provides a welcome backdrop to all golfers. |
|
|
FOR A PHOTO TOUR AND ANALYSIS
OF THE FRONT NINE
|
|
|